
 Updated July 9, 2026
Getting Started With the Desktop App
Install the MoodMonkey desktop app on Windows, connect it with your API key, and add your employees so the daily check-in pop-up starts working.
In This Guide
Before You Start
You need three things:
- A MoodMonkey administrator account on app.moodmonkey.io
- One or more Windows computers (the desktop app is Windows-only for now)
- Administrator rights on those computers
Tip: Rolling out MoodMonkey for a whole team? Ask your system administrator to handle steps 2 and 3. Installing the app and editing its configuration file require Windows administrator rights.
Step 1: Create an API Key
The desktop app identifies your company with an API key. You create one in the web portal:
- Log in to your administrator account on app.moodmonkey.io.
- Go to the Settings page.
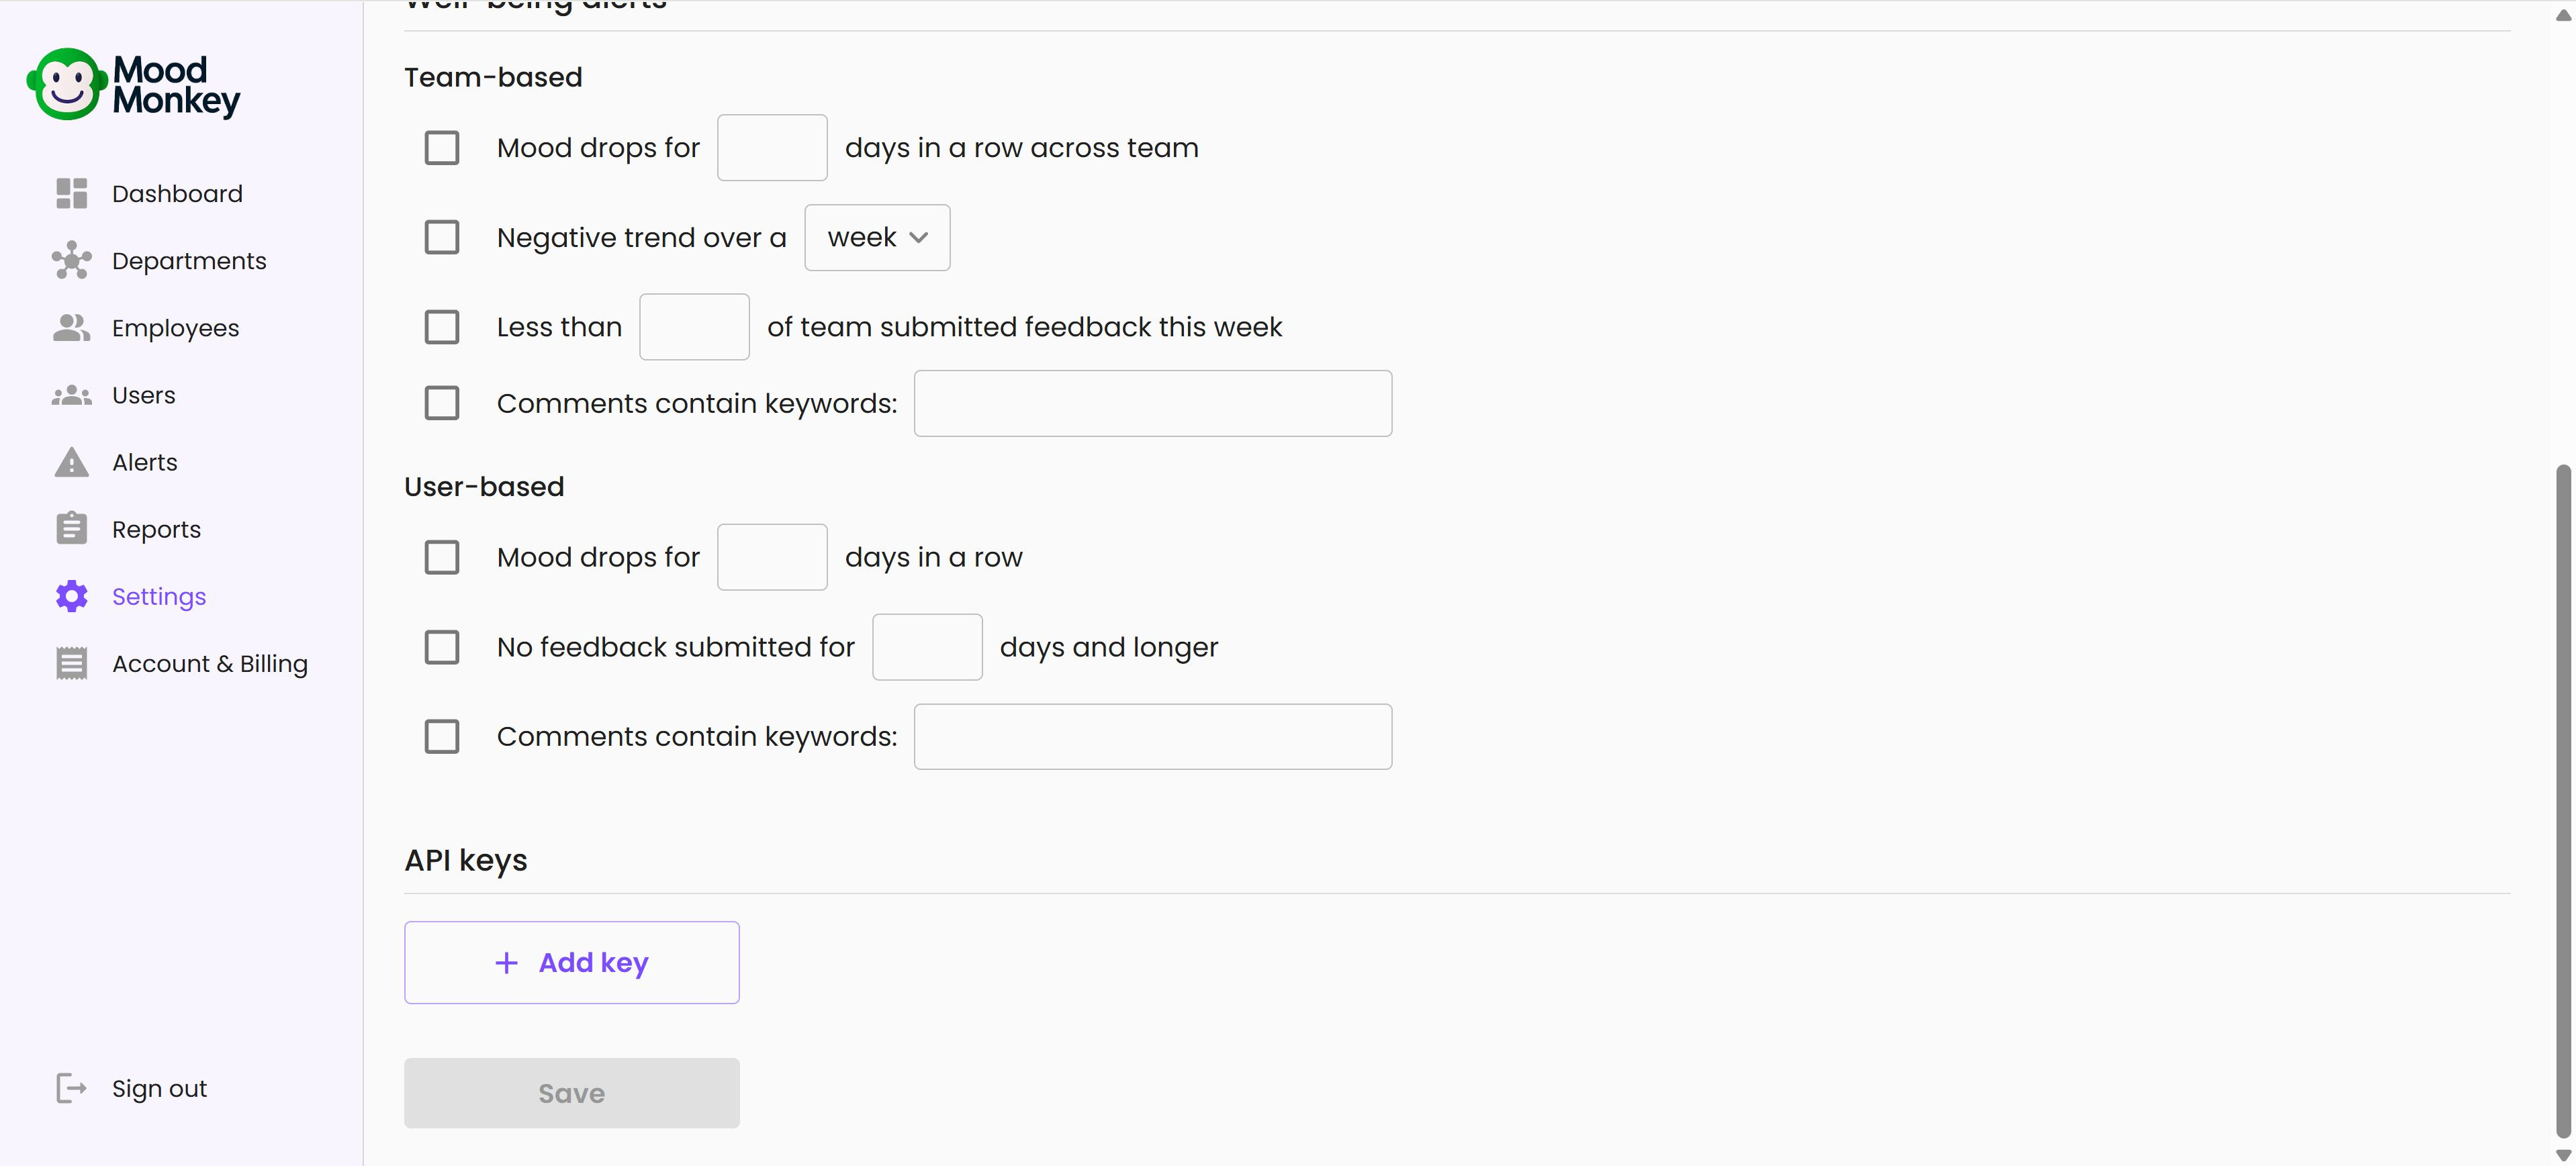
- In the API keys section, press Add key.
- Enter a name for the key, pick a validity date, and press Save.
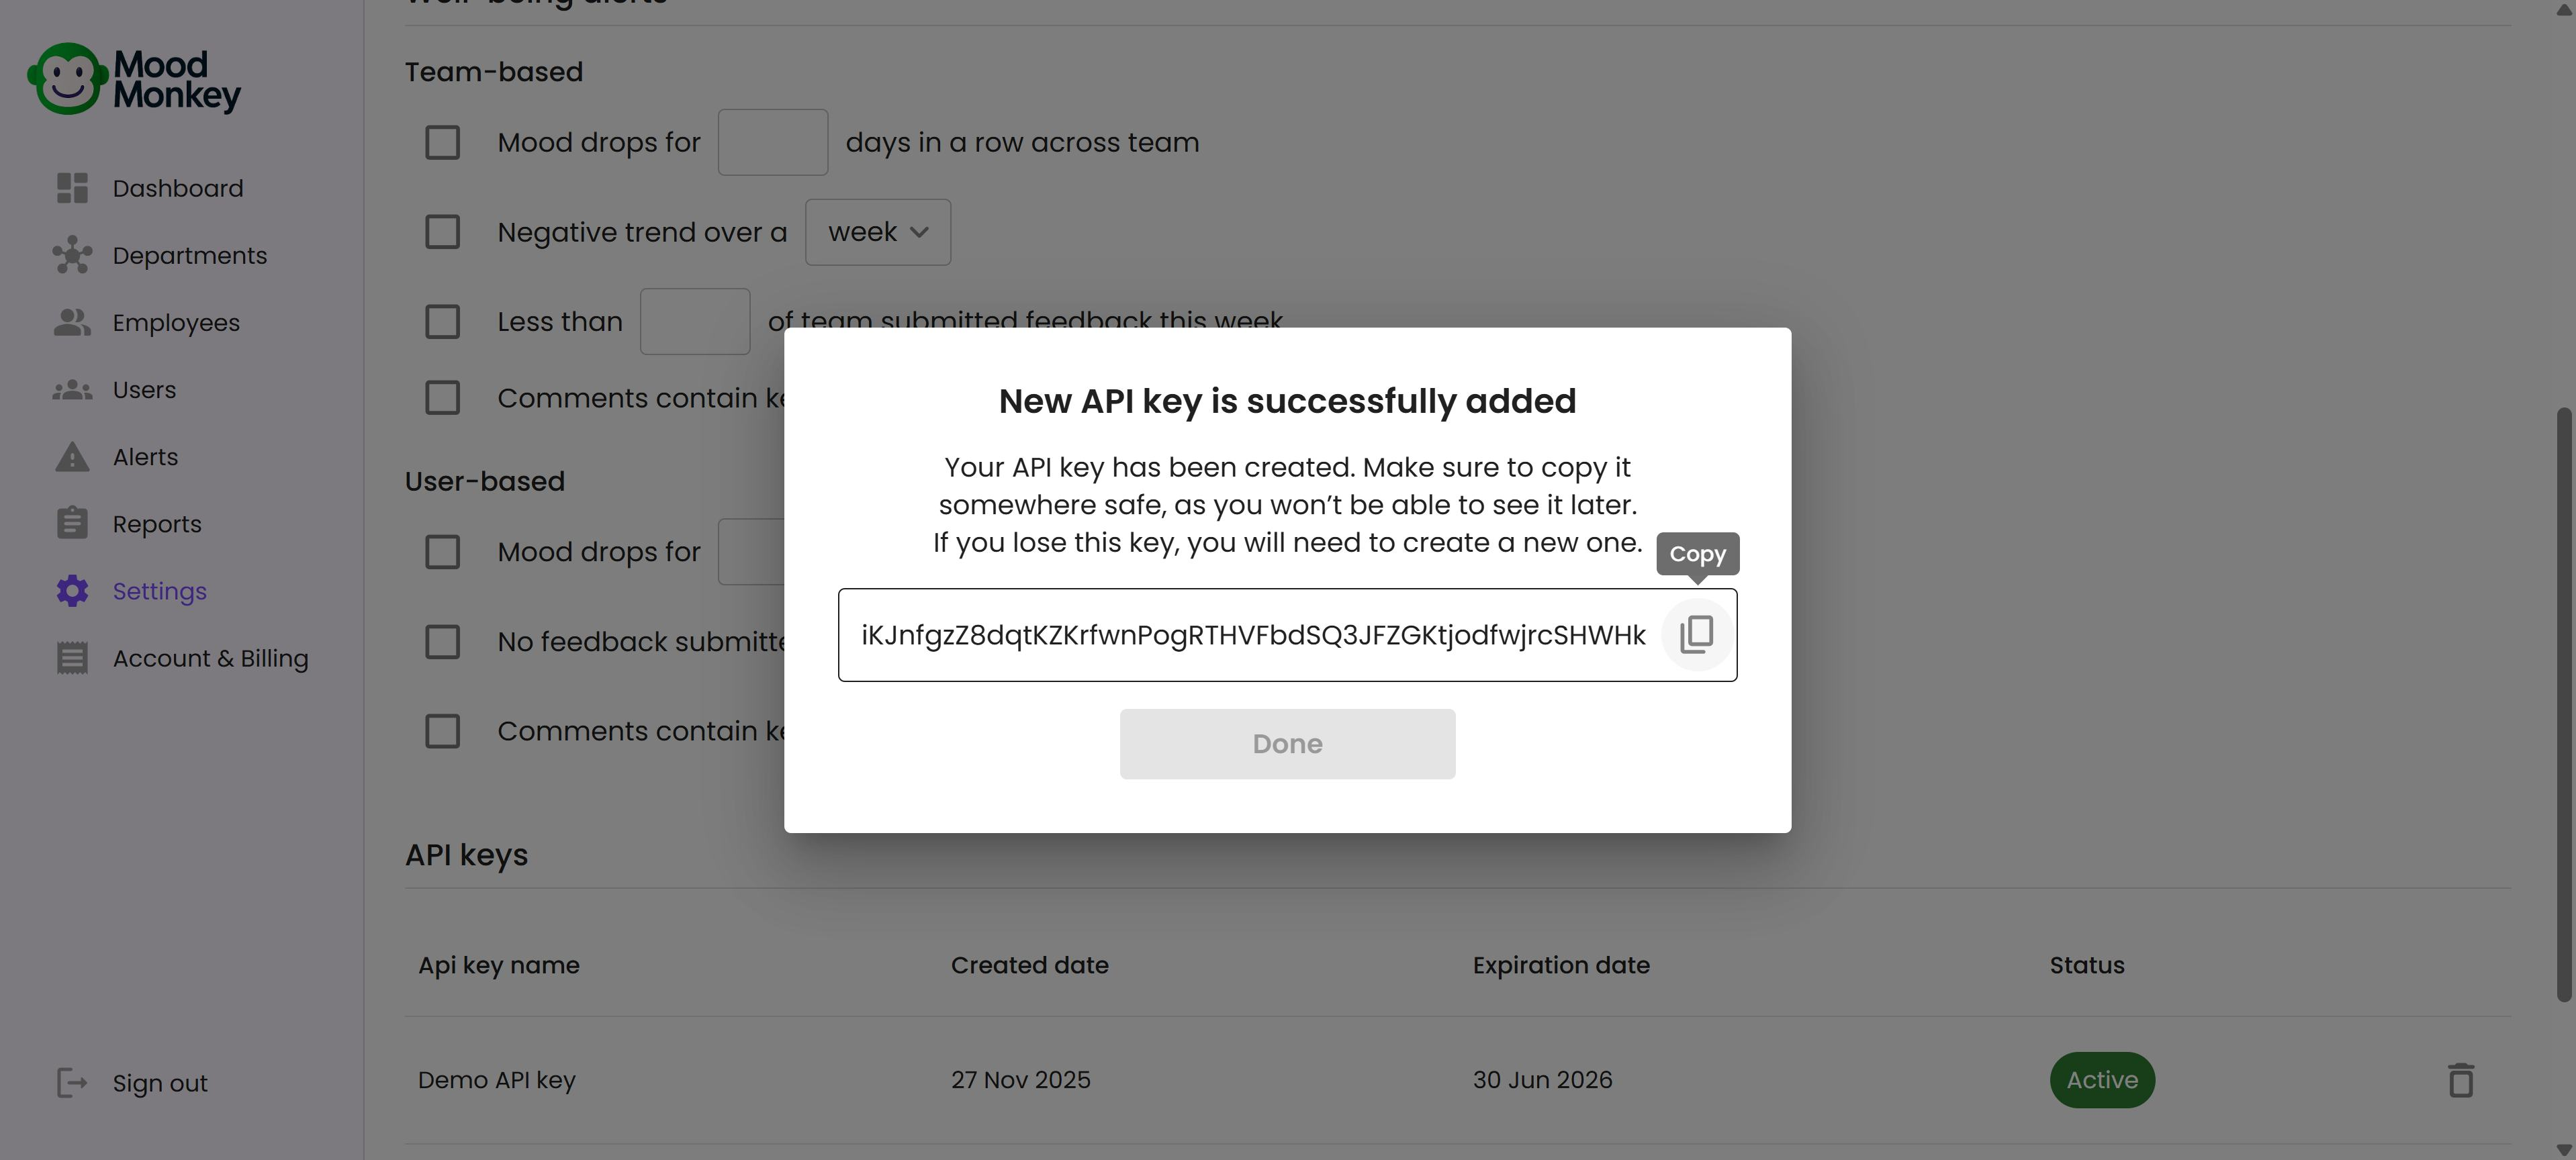
- Copy the generated key value and keep it somewhere safe. You paste it into the app in step 3.
Important: The key value is visible only once, right after you create it. If you lose it, create a new key.
Step 2: Install the App on Each Computer
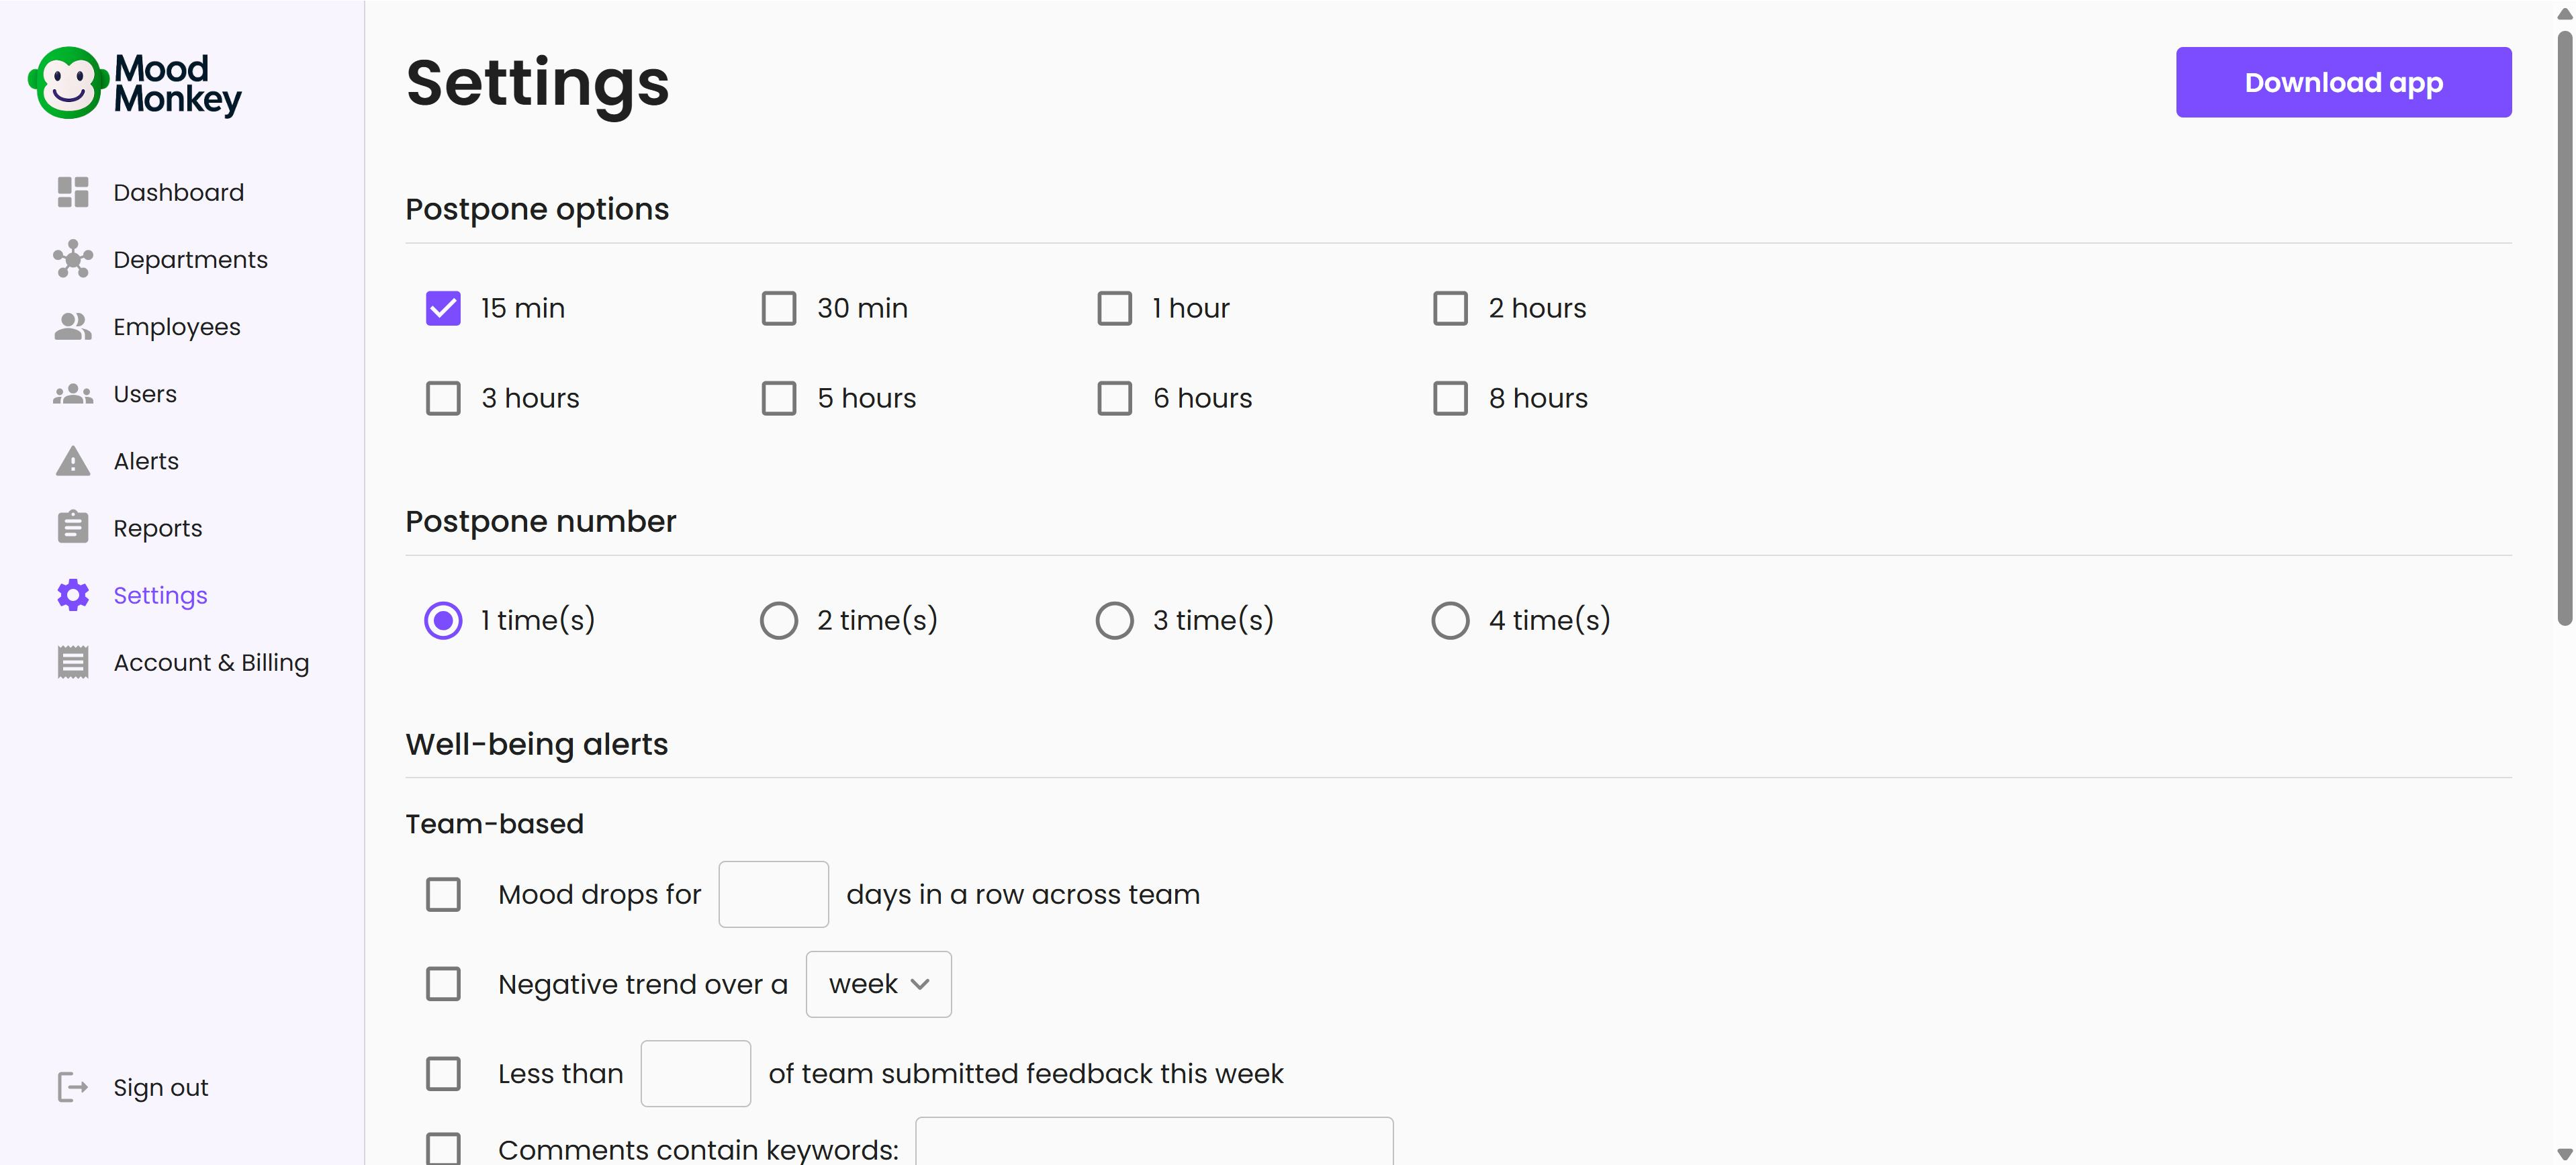
- In the portal, go to Settings and press the Download app button in the top right corner.
- Save the MSI installer on the computer where MoodMonkey should run.
- Run the installer. The app needs the .NET Desktop Runtime 8: if it is missing, the installer shows an extra dialog that lets you install it first.
- Walk through the installation: allow the installer to make changes, pick a destination folder, and close the setup when it finishes.
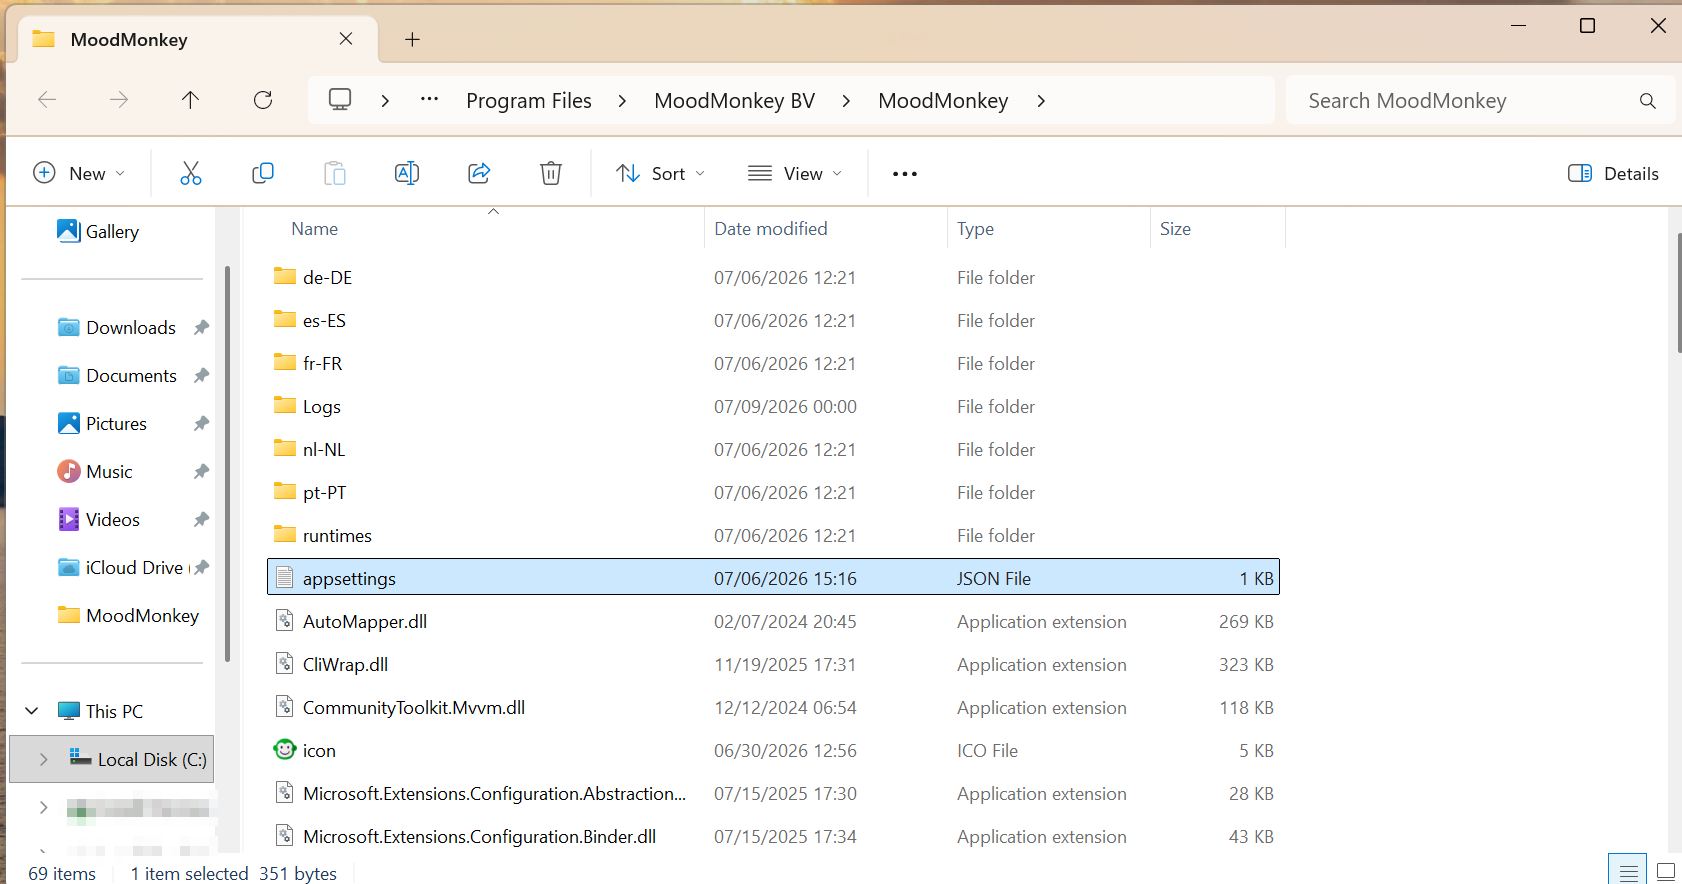
- Check that the app landed in the destination folder. By default that is
C:\Program Files\MoodMonkey BV\MoodMonkey. In Services you should also see the MoodMonkey Updater service running. It keeps the app up to date automatically.
Tip: Installing on many computers? You can install silently with default settings from an elevated command prompt: msiexec /i MoodMonkeySetup.msi REBOOT=R /q /norestart
Step 3: Connect the App With Your API Key
The app reads its configuration from the file appsettings.json in the installation folder. This is the step where most installations go wrong, so take it slowly.
Open the installation folder. Go to C:\Program Files\MoodMonkey BV\MoodMonkey in File Explorer and find appsettings.json.
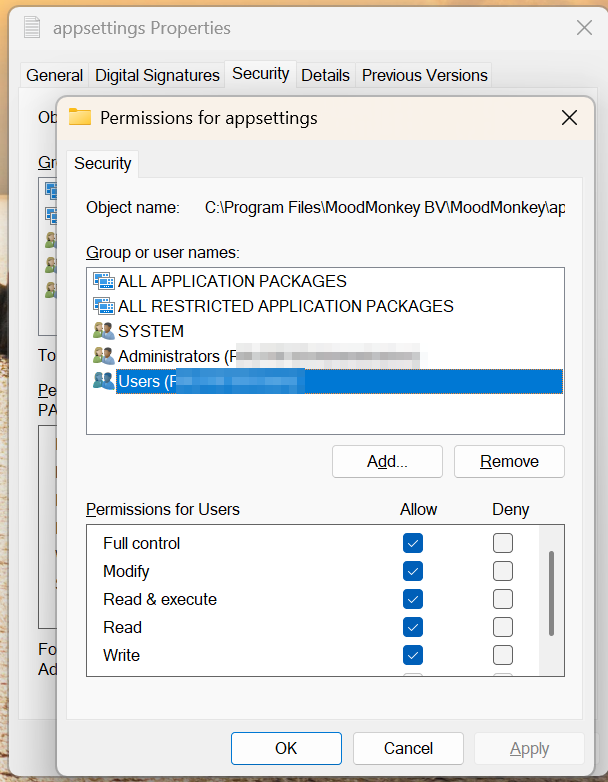
Make sure you can edit the file. Right-click appsettings.json, choose Properties, and open the Security tab. Select your user or the Users group under "Group or user names" and check that Write is allowed.
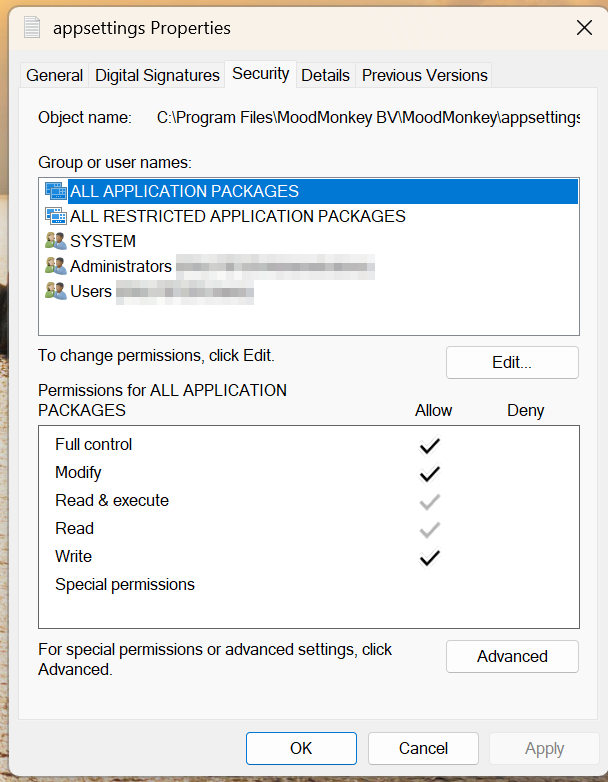
If Write is not allowed, press Edit, select the user or group, tick the Allow box next to Write, and confirm with OK.
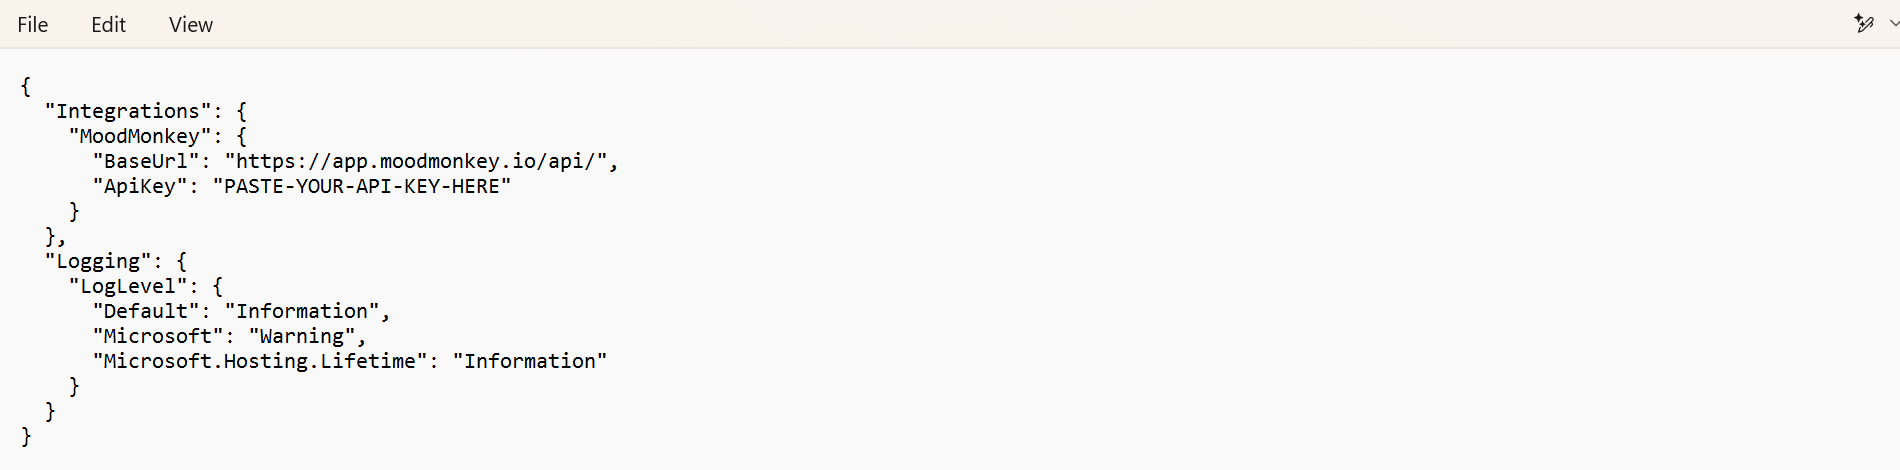
Paste your API key. Open appsettings.json in Notepad and paste the key from step 1 between the quotes of the ApiKey field. Save the file.
Start the app. Double-click MoodMonkey.exe in the installation folder. The app runs in the background; you can confirm it is running in Task Manager.
Important: The app reads appsettings.json only when it starts. If you change the API key while the app is running, start MoodMonkey.exe again. The new instance automatically replaces the old one.
Step 4: Add Your Employees
Every person who should receive the pop-up must be registered as an employee, and the employee ID must exactly match their Windows login name.
- In the portal, go to the Employees page.
- Press New employee and choose Add manually.
- Fill in the form. In the ID field, enter the person's Windows login name.
- Save the employee.
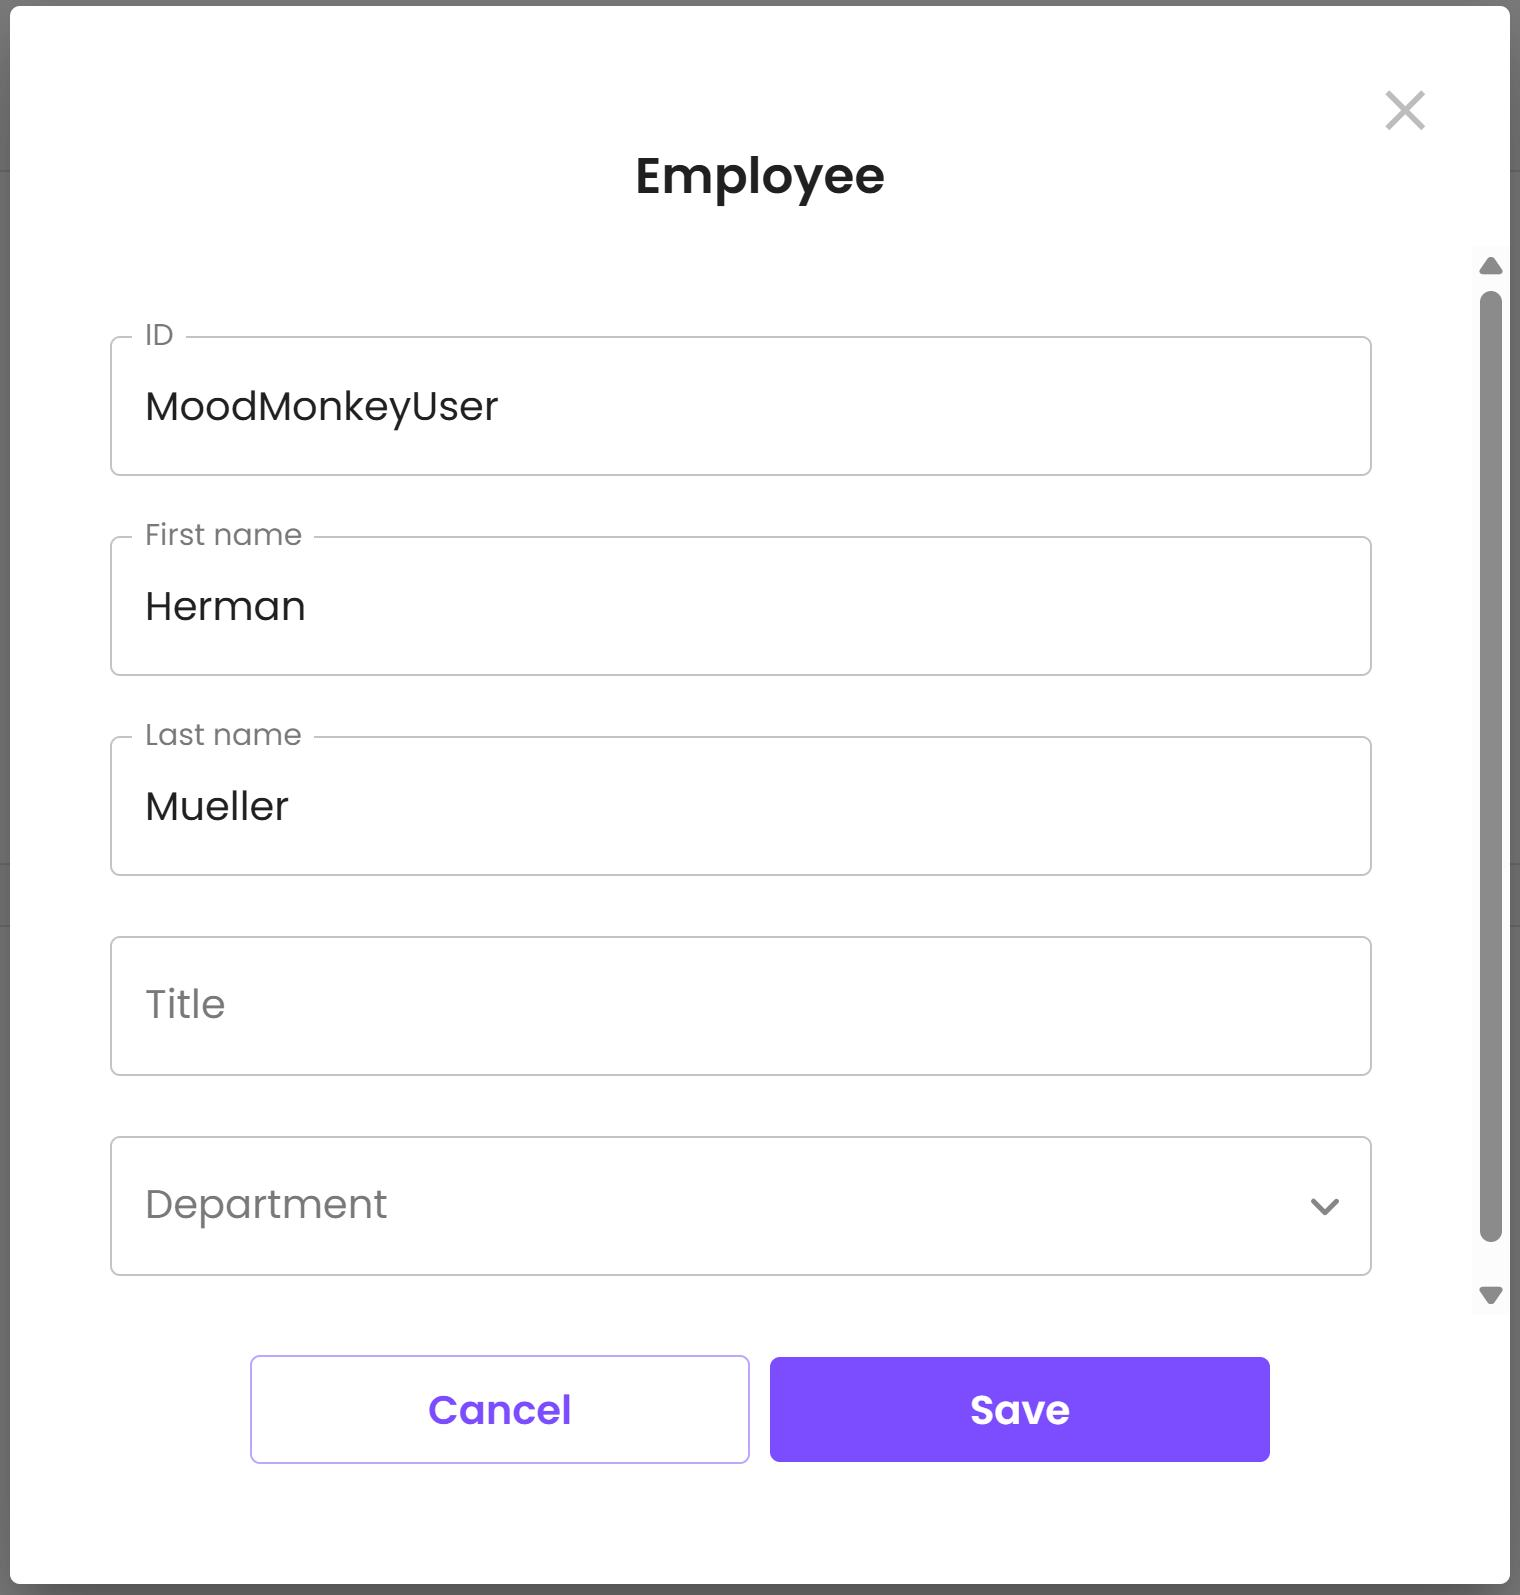
Not sure what someone's Windows login name is? Open Command Prompt on their computer and run whoami. The part after the backslash is the login name:
C:\Users\anna> whoami
office-pc\anna
In this example the ID is anna.
Important: Use the login name, not the person's display name. Windows may show someone as "Chris Prime" in menus while the actual login name is chris. When in doubt, run whoami.
Tip: Adding a lot of people at once? Go to Employees, press New employee, and choose Batch upload to import a CSV file.
Step 5: Check That It Works
With the app running and your employees registered, the check-in pop-up appears at the display time you configured on the Settings page.
A few things that are useful to know:
- The app checks for pending check-ins right after it starts and then every ten minutes, so configuration changes take effect within ten minutes.
- The app also schedules a check at the exact display time, so the pop-up appears on time even between polls.
- Responses show up in your dashboard right away.
If the pop-up does not appear, walk through the troubleshooting list below.
Troubleshooting: The Pop-Up Does Not Appear
Work through these causes in order; the most common ones come first.
- The employee ID does not match the Windows login name. Run
whoamion the employee's computer and compare the part after the backslash with the ID in the portal. They must match exactly. - No seats available. Every registered employee needs an available seat in your subscription. Check the Account & Billing page: if your team outgrew your seats, the pop-up silently stops appearing for the overflow.
- The app started before you saved the API key. The configuration file is read at startup only. Start
MoodMonkey.exeagain; it replaces the running instance. - The app is not running. Look for MoodMonkey in Task Manager. If it is missing, start
MoodMonkey.exefrom the installation folder.
The app writes log files to the Logs folder inside the installation folder. If you are still stuck, mail them to [email protected] and we will figure it out together.