 Bijgewerkt 9 juli 2026
Werken Met het Webportaal
Alles wat beheerders en stakeholders doen in het MoodMonkey-webportaal: accounts en rollen, medewerkers, afdelingen, het dashboard en de instellingen.
Inloggen
Toegang tot het portaal werkt op uitnodiging. Nodigt een collega je uit, dan ontvang je een e-mail die zeven dagen geldig is.
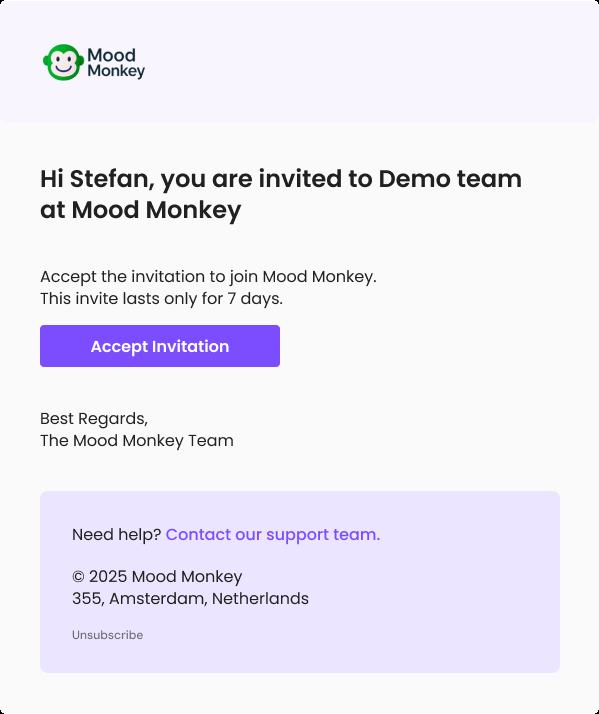
- Klik in de e-mail op Accept Invitation.
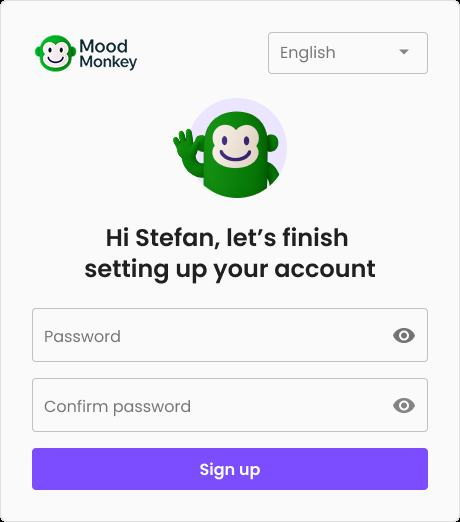
- Stel je wachtwoord in en bevestig het.
- Bevestig de registratie.
- Log in op app.moodmonkey.io met je e-mailadres en wachtwoord.
Gebruikers en Rollen
Gebruikers zijn de mensen die in het webportaal kunnen inloggen. Er zijn twee rollen:
- Company Administrator: volledige toegang. Beheerders beheren gebruikers, medewerkers, afdelingen, instellingen, API-keys en facturatie, en zien alle dashboards en alerts.
- Company Stakeholder: leestoegang. Stakeholders zien dashboards, medewerkers, afdelingen en alerts, maar kunnen de inrichting niet wijzigen.
Mensen die alleen de dagelijkse check-in op hun computer beantwoorden zijn medewerkers, geen gebruikers: zij werken met de desktop-app en hebben geen portaaltoegang.
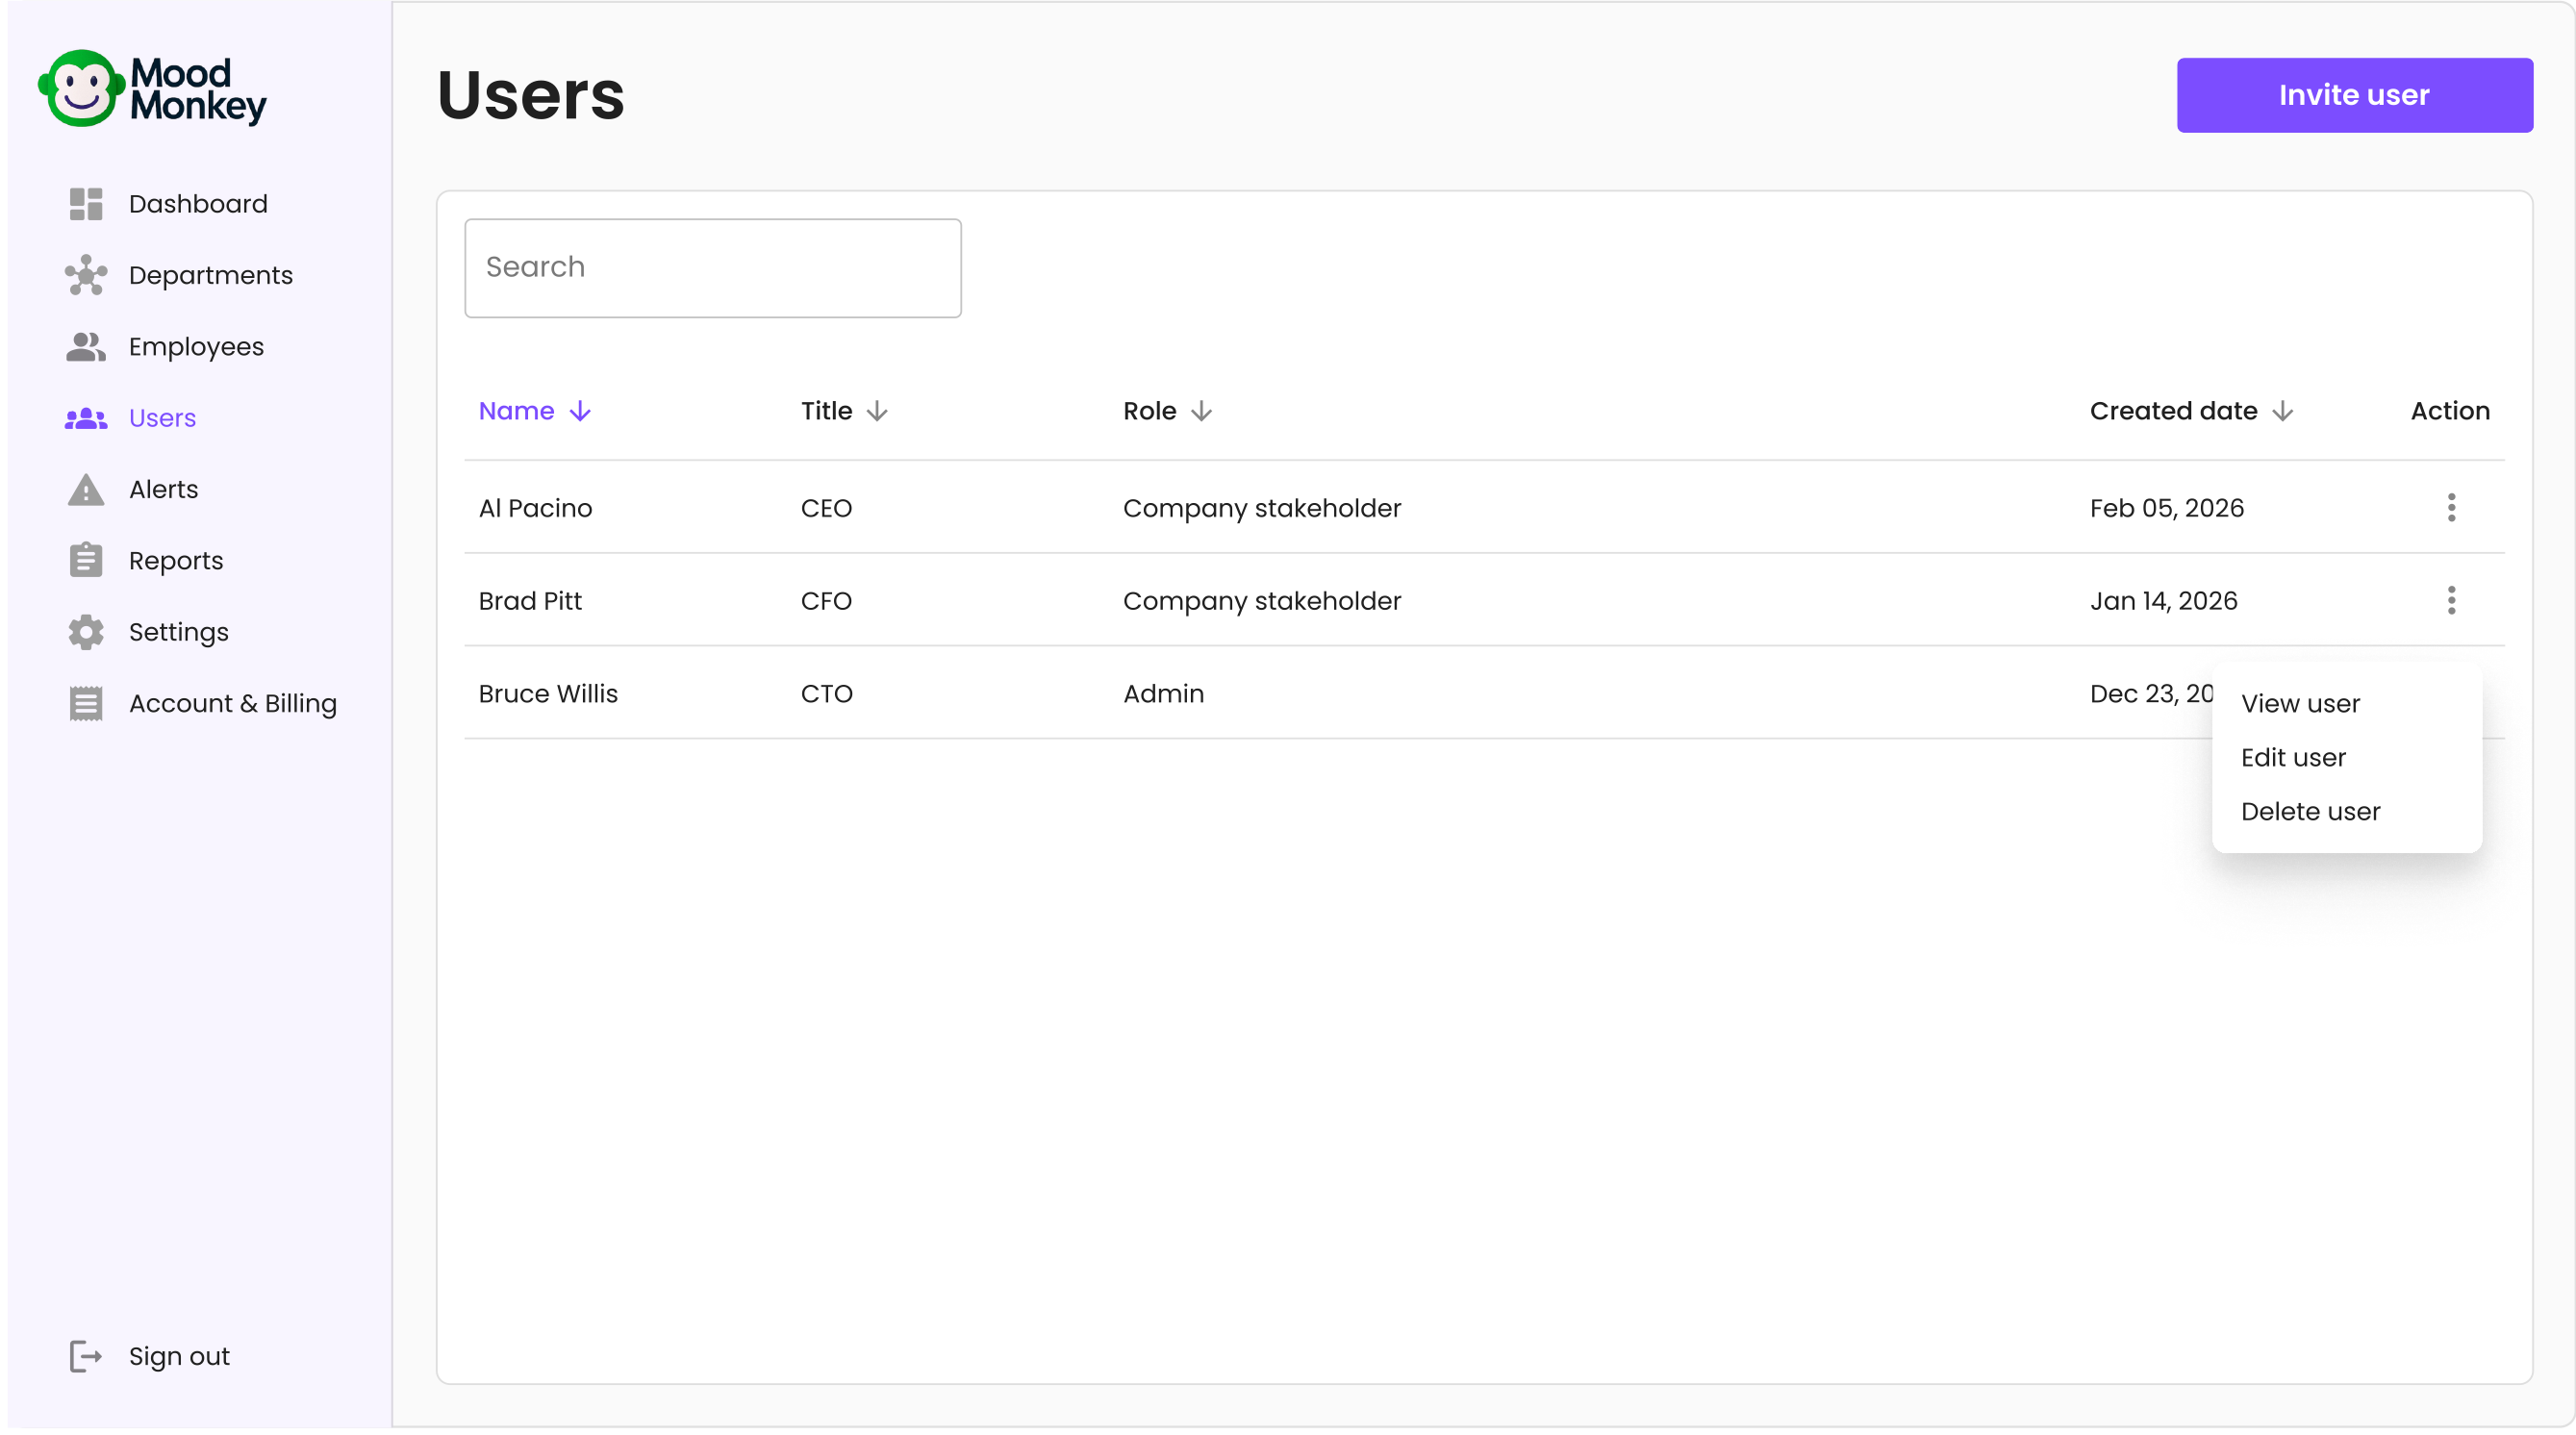
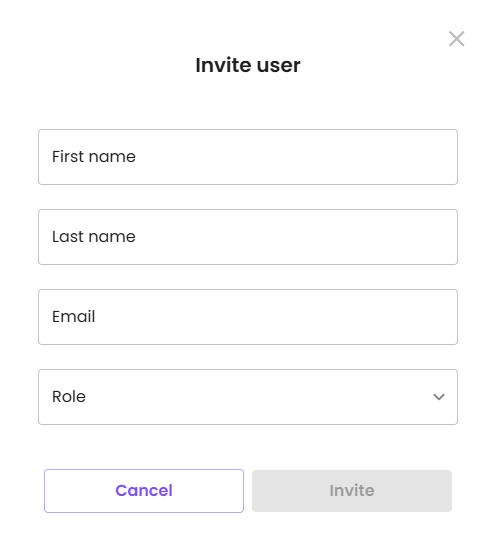
Beheerders nodigen nieuwe gebruikers uit vanaf de pagina Users: klik op Invite user, vul naam, e-mailadres en rol in en klik op Invite.
Medewerkers
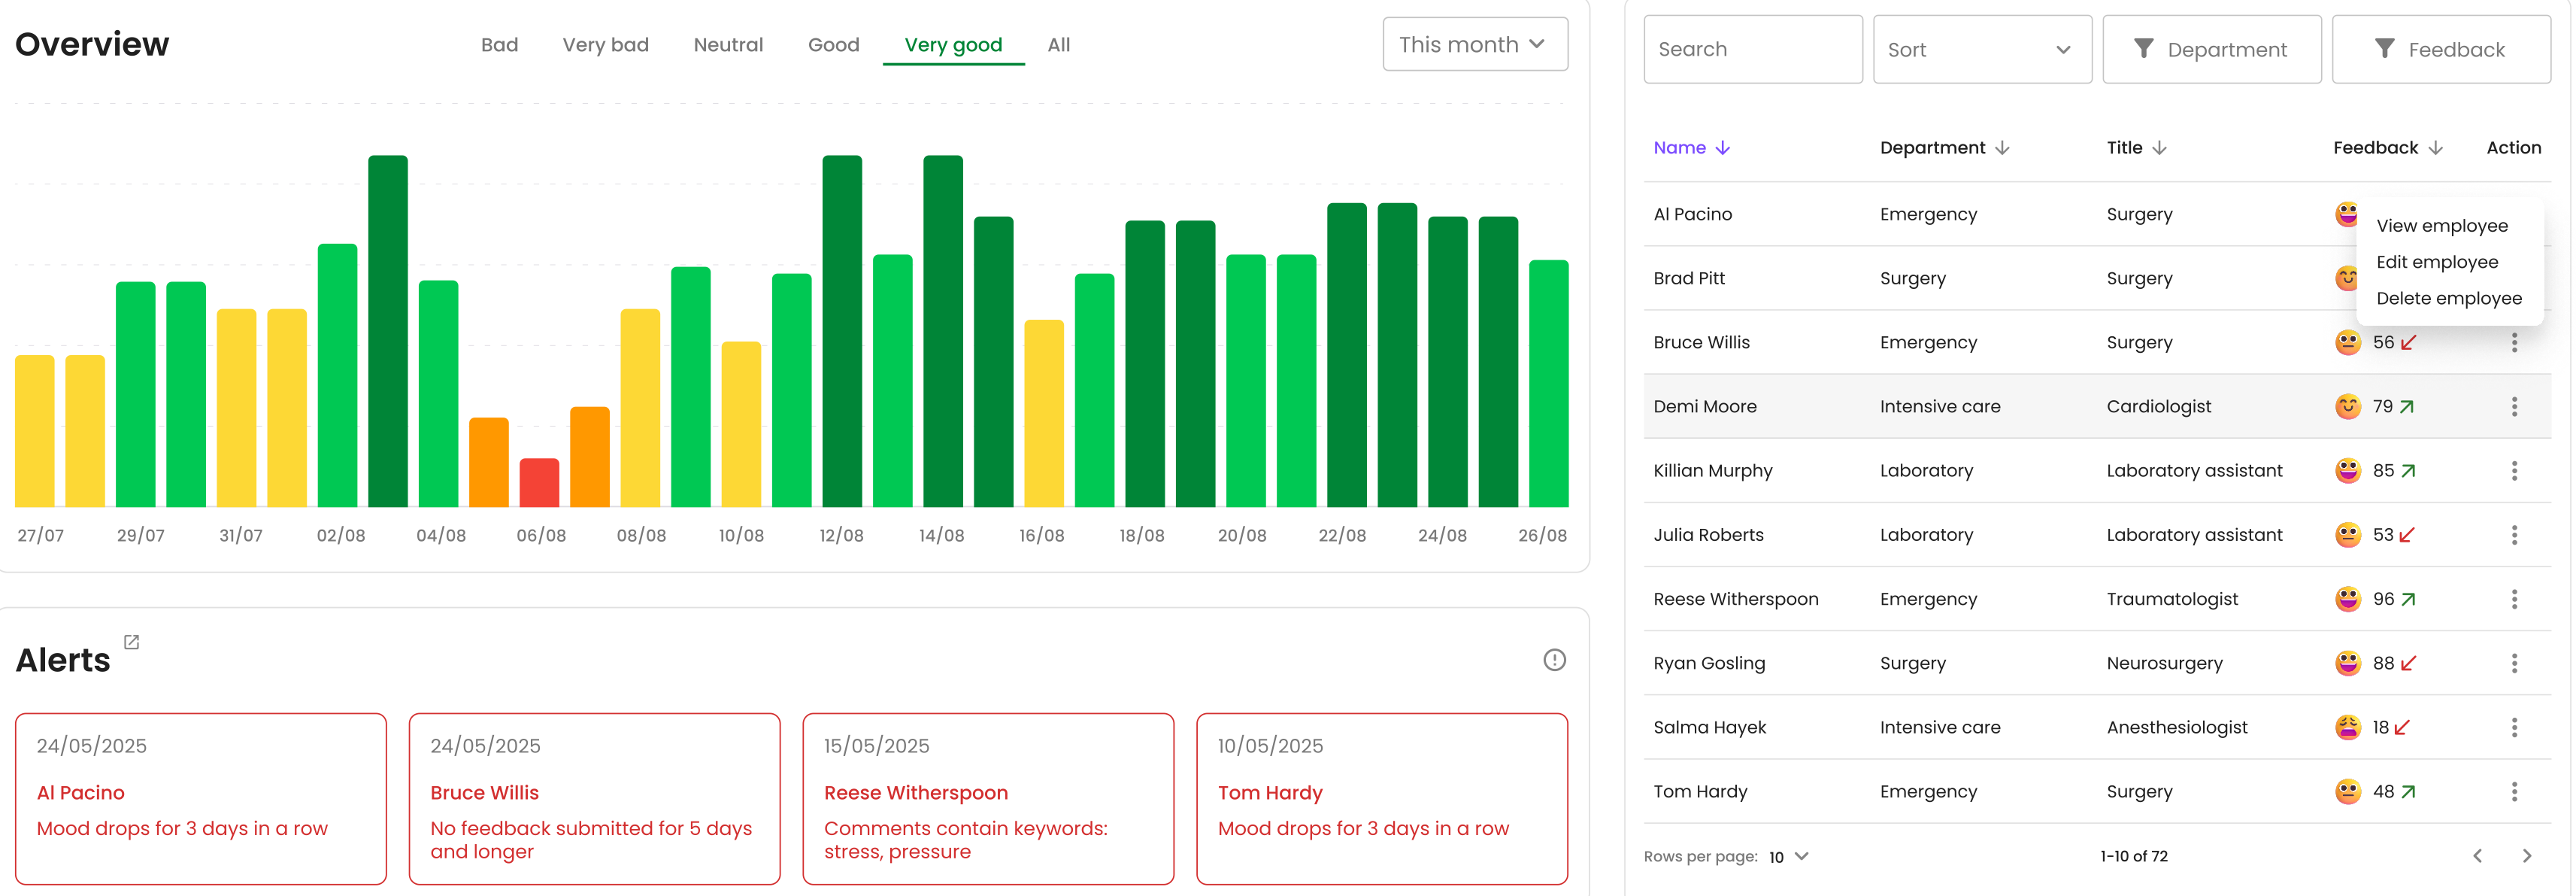
De pagina Employees toont iedereen die de dagelijkse check-in krijgt, de feedback die ze gaven en eventuele alerts. Hoe je medewerkers toevoegt (en waarom het ID exact de Windows-loginnaam moet zijn) staat in stap 4 van de Aan de Slag-gids.
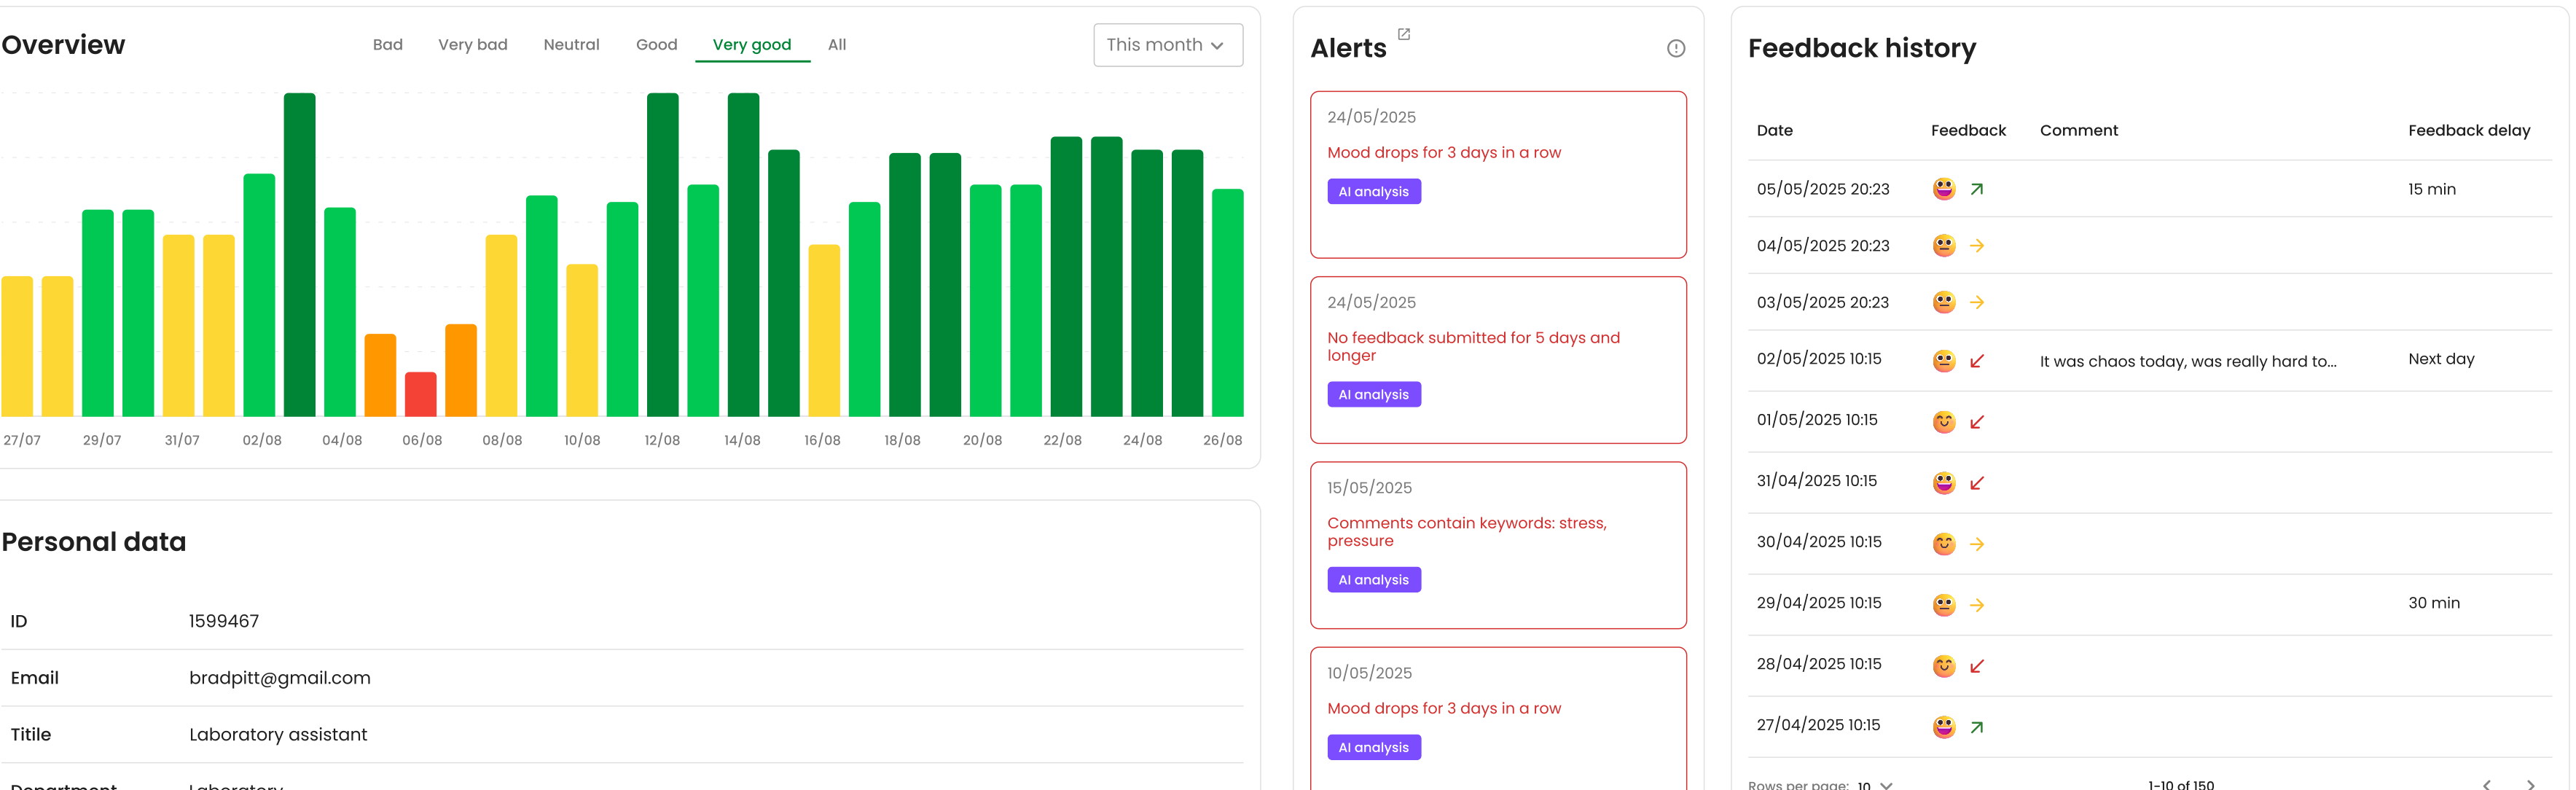
Selecteer een medewerker voor de detailpagina: feedbackgeschiedenis, persoonsgegevens en alerts van die ene persoon.
Tip: De eigen Display timing van een medewerker gaat boven die van de afdeling en het bedrijf. Handig voor mensen die andere uren werken dan hun team.
Afdelingen
Afdelingen groeperen medewerkers per team of functie, zodat je feedback en alerts per team kunt vergelijken in plaats van alleen bedrijfsbreed.
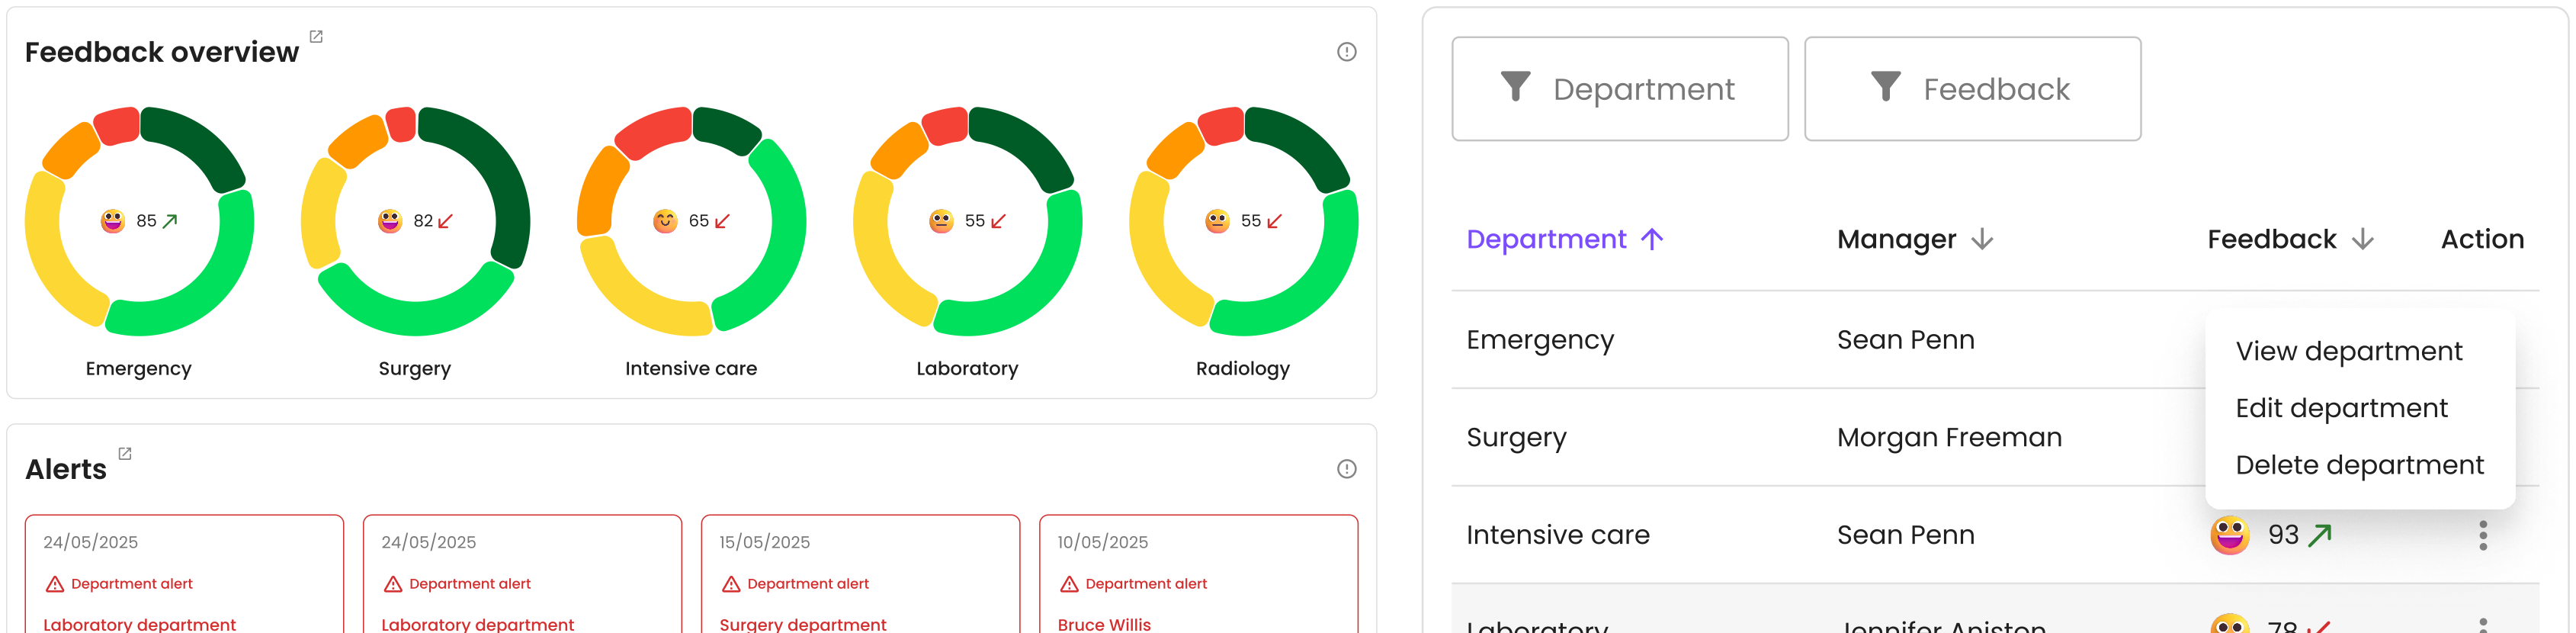
Beheerders maken afdelingen aan met de knop New department: kies een naam, wijs managers toe en stel eventueel een display timing in.
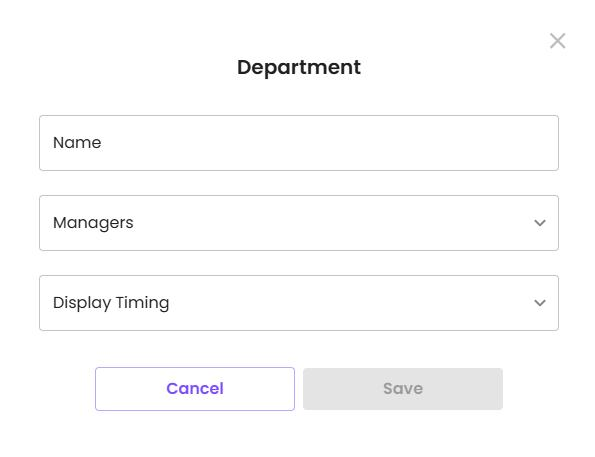
Tip: De Display timing van een afdeling gaat boven de bedrijfsinstelling, en de timing van een individuele medewerker gaat boven allebei.
Dashboard
Het dashboard is het bedrijfsbrede overzicht. Elke widget kan wisselen tussen een week- en een maandweergave.
- Feedback overview en Total score: hoe de feedback over de stemmingsniveaus is verdeeld, en de totaalscore vergeleken met de vorige periode.
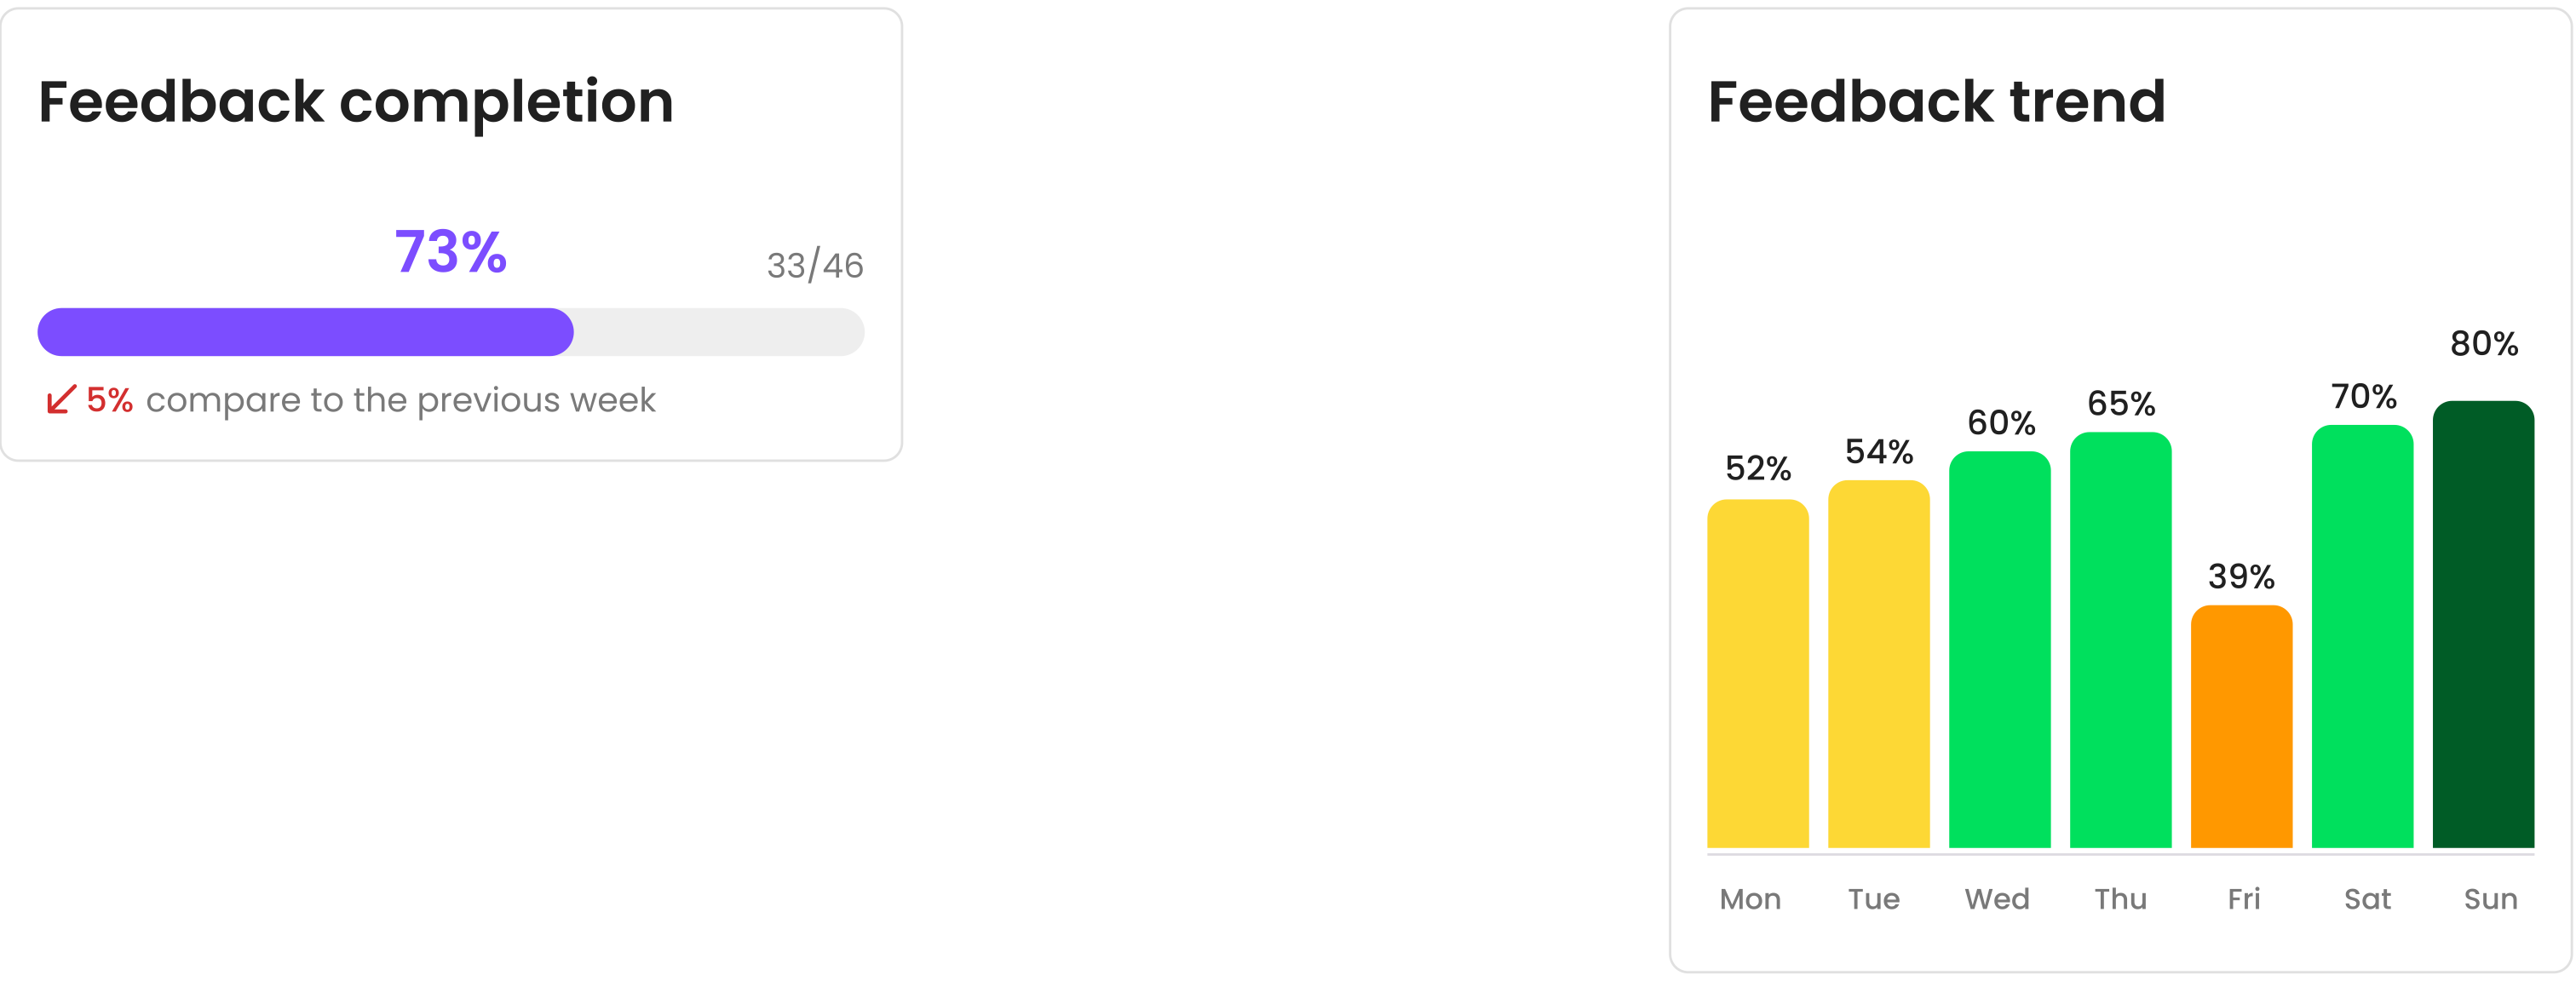
- Feedback completion en Feedback trend: hoeveel medewerkers reageerden, en hoe de score zich over tijd ontwikkelt.
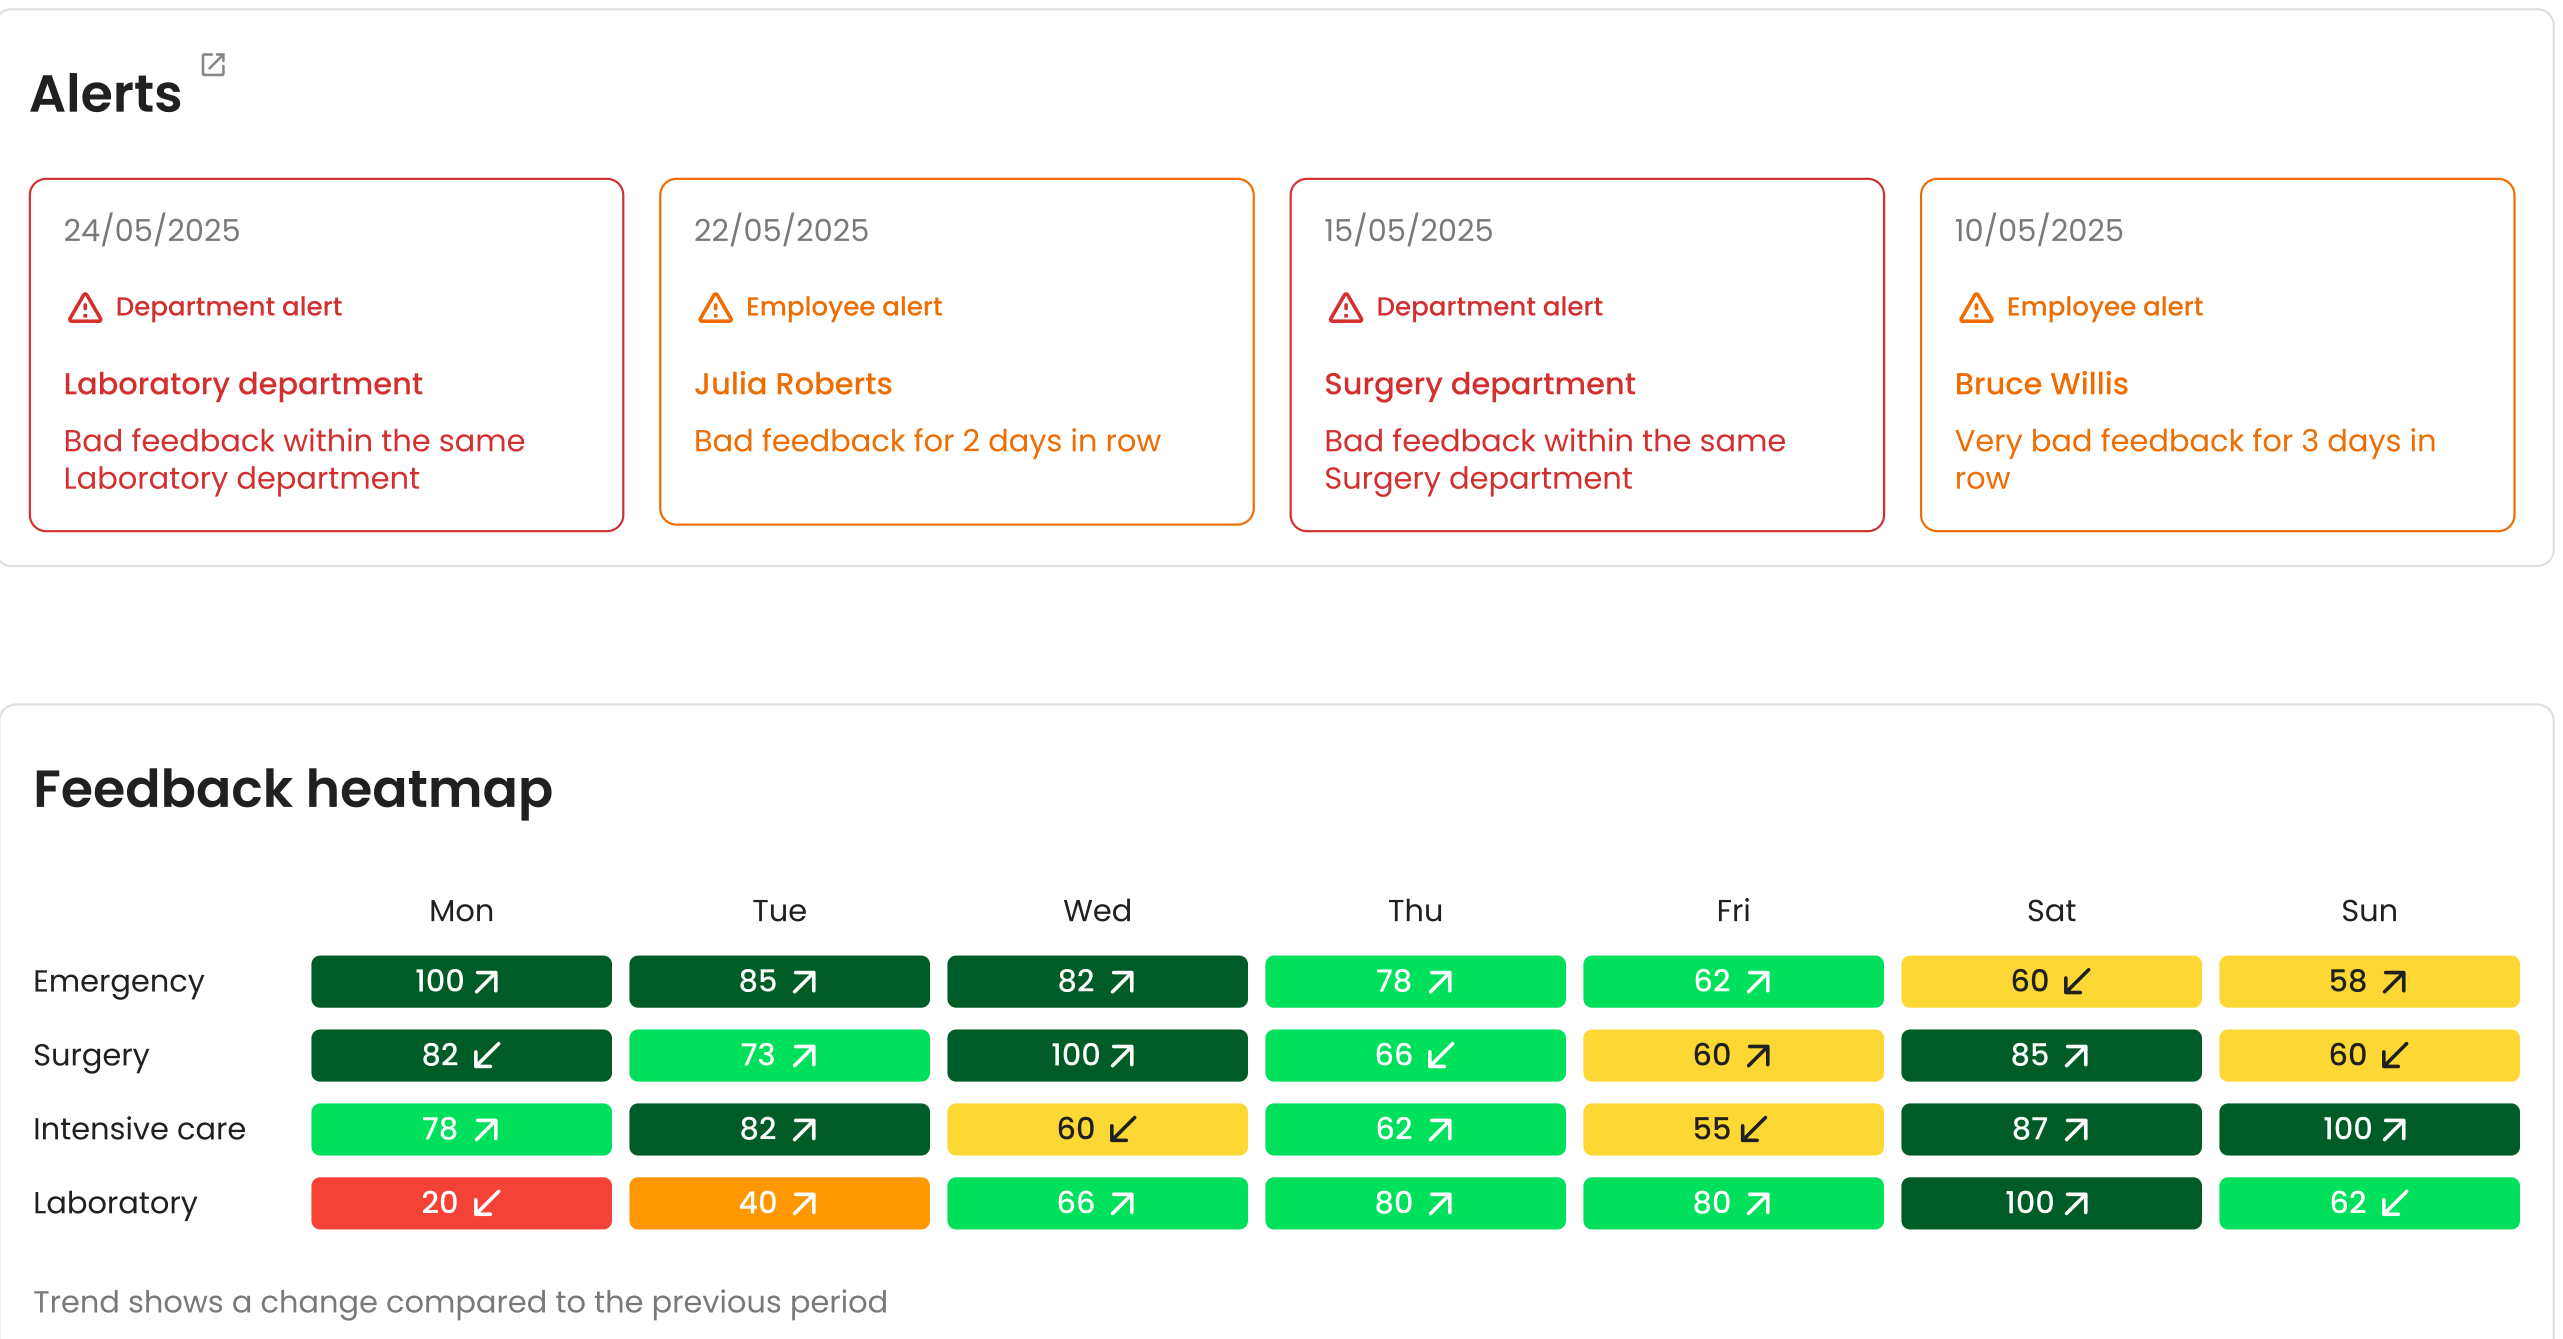
- Alerts en Feedback heatmap: signalen die aandacht vragen, en scores per afdeling over tijd zodat patronen opvallen.
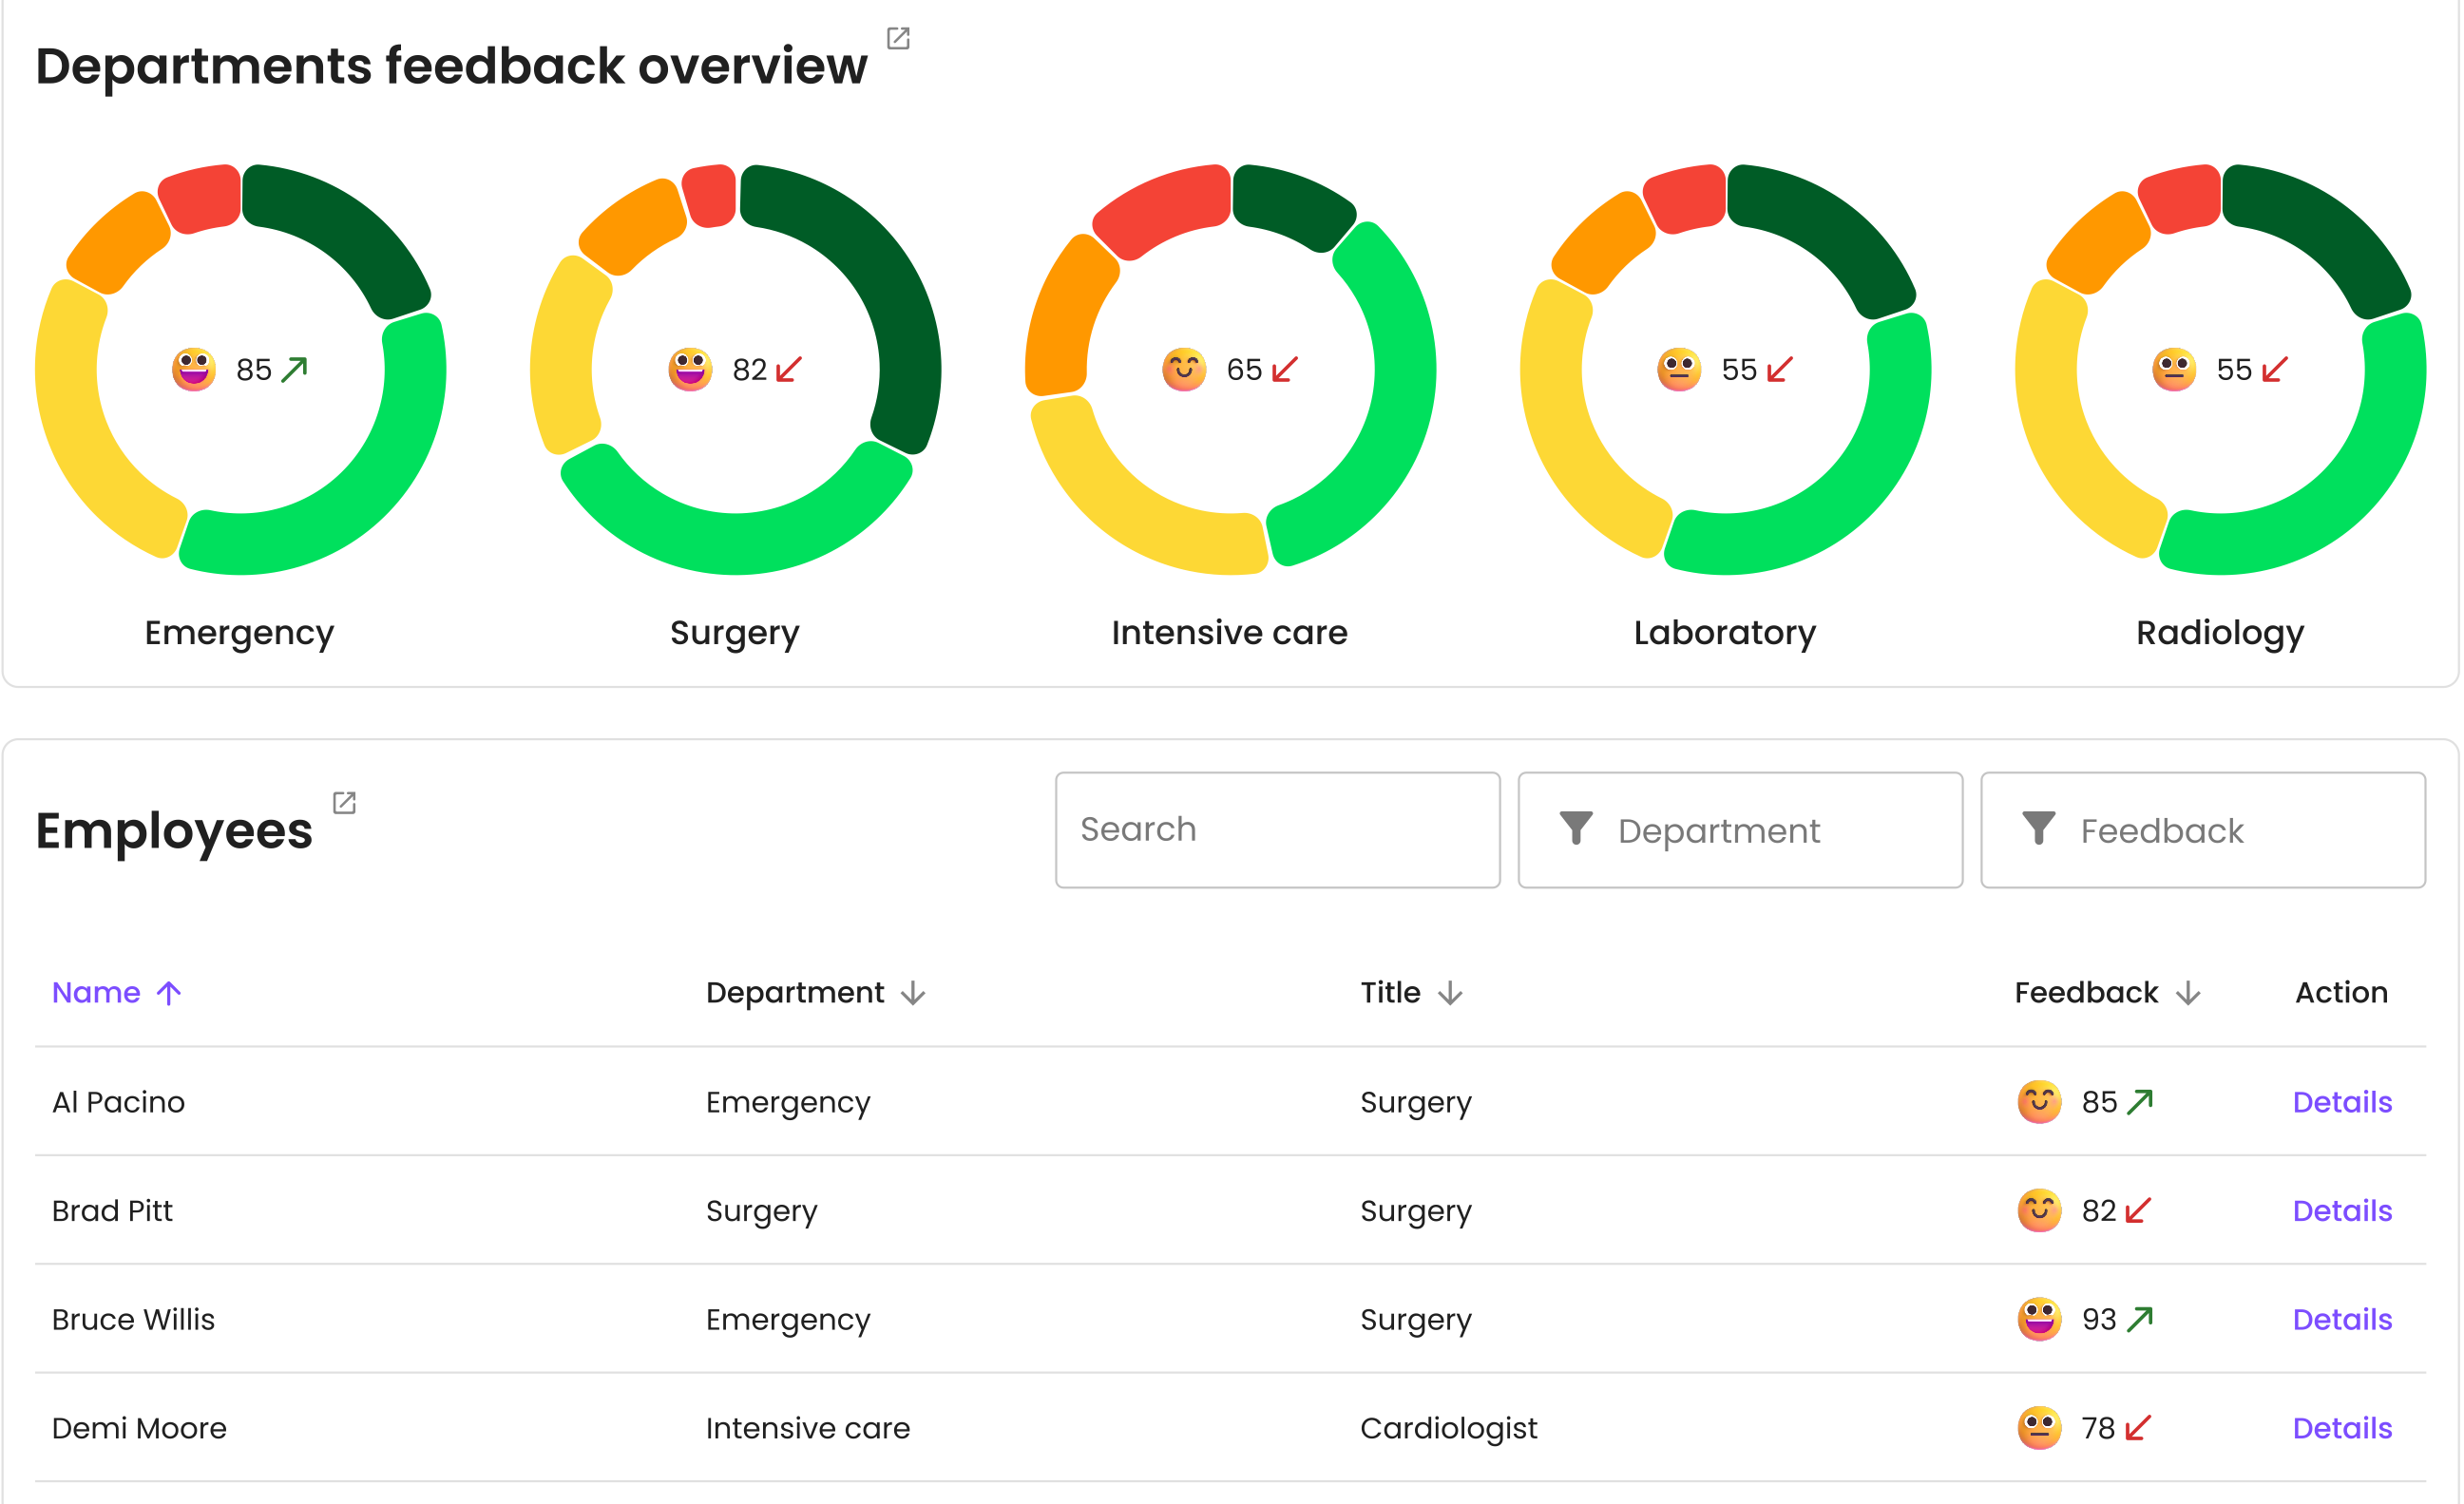
- Department feedback overview en de tabel Employees: vergelijk teams in één oogopslag en zoek, filter of sorteer de volledige medewerkerslijst.
Instellingen
De pagina Settings bepaalt hoe MoodMonkey zich voor jouw bedrijf gedraagt:
- Default language: de systeemtaal. Medewerkers kunnen in de desktop-app alsnog hun eigen taal kiezen.
- Display timing: wanneer de dagelijkse check-in verschijnt. Drie opties: Automatic (MoodMonkey leert van activiteitspatronen en kiest het beste moment voor het einde van de werkdag), Fixed time, of Time span (een aantal uur na de start van de werkdag). Afdelingen en individuele medewerkers kunnen hiervan afwijken.

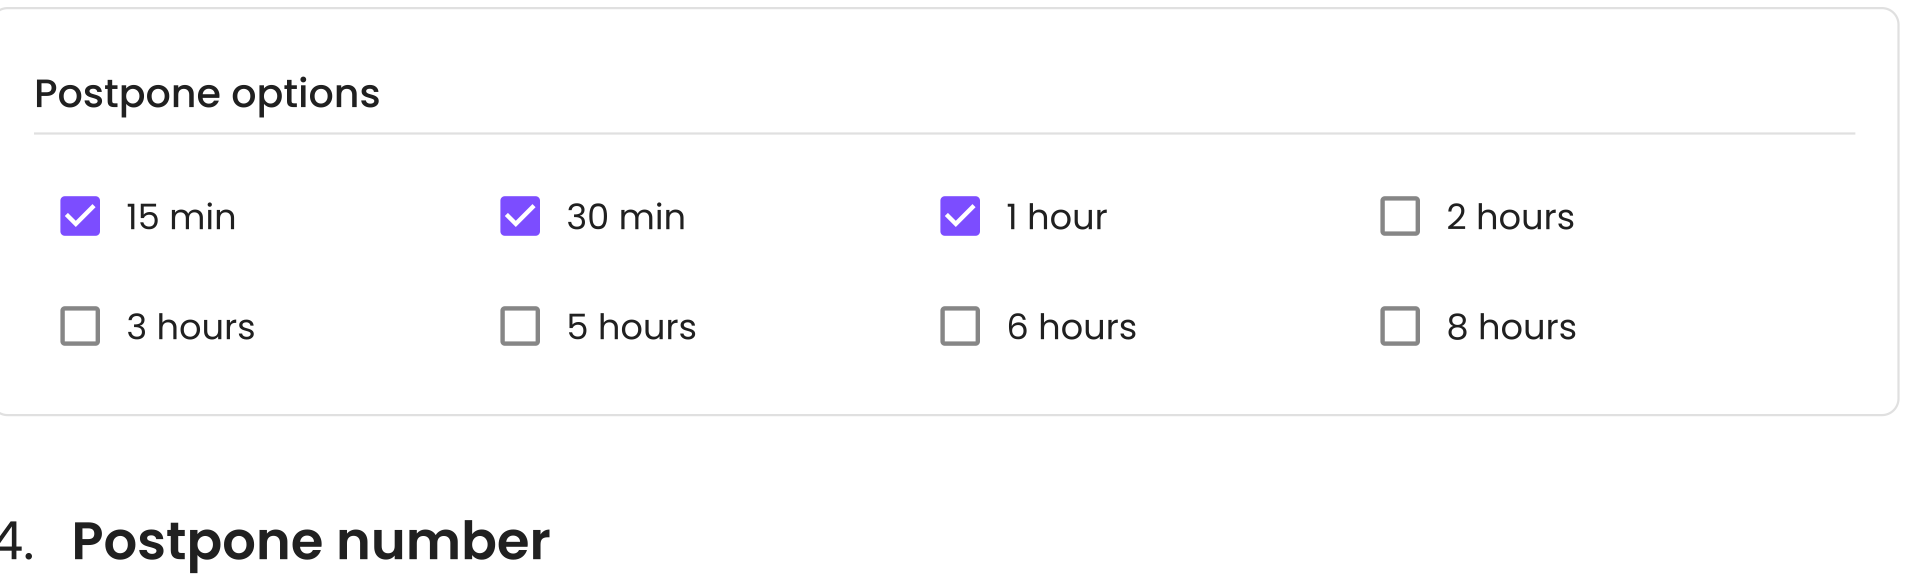
- Postpone options en Postpone number: welke uitsteltijden medewerkers kunnen kiezen als ze de check-in uitstellen, en hoe vaak ze dat mogen doen.
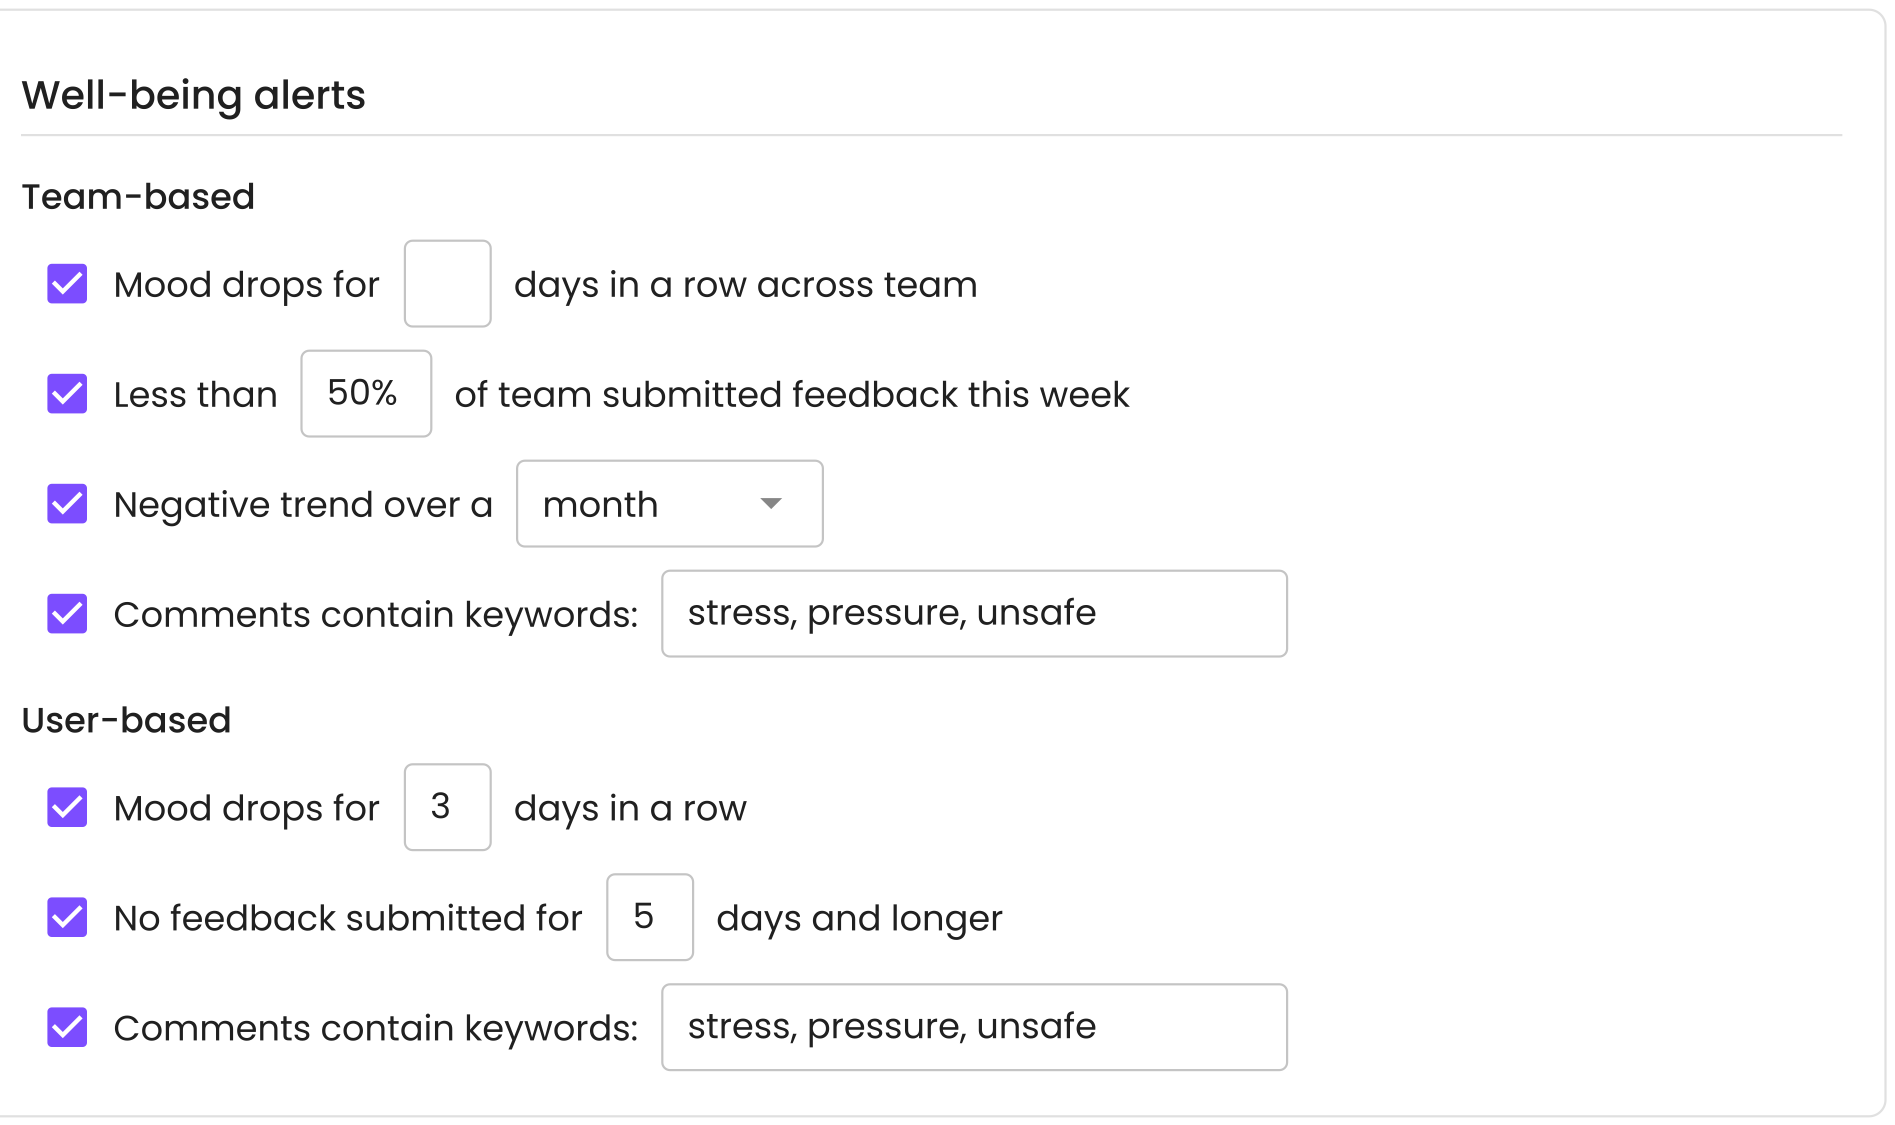
- Well-being alerts: de triggers die alerts aanmaken, in twee groepen. Teamtriggers letten op het hele team (stemming die meerdere dagen op rij daalt, lage deelname, een negatieve maandtrend, of opmerkingen met trefwoorden die jij kiest). Individuele triggers letten op één persoon (opeenvolgende stemmingdalingen, een aantal dagen geen feedback, trefwoorden).
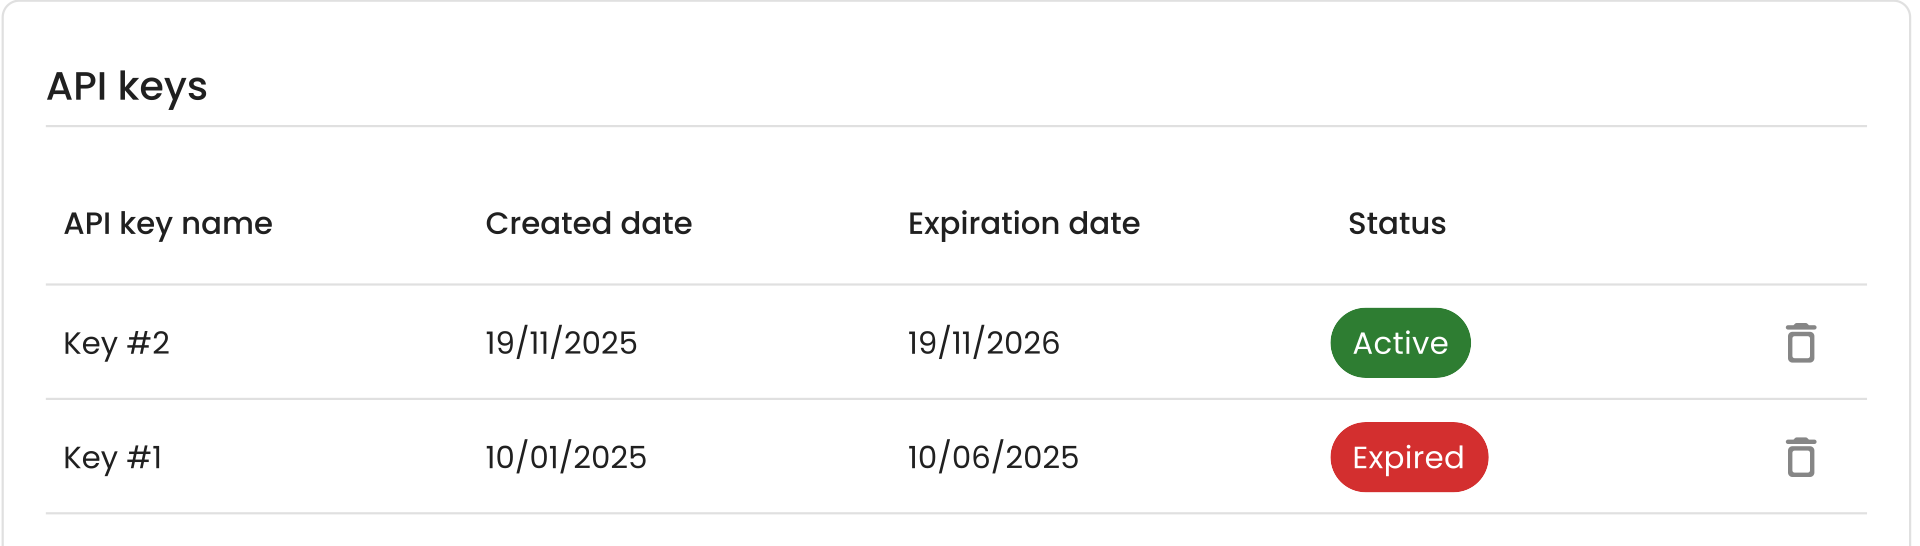
- API keys: de keys die desktop-installaties aan je bedrijf koppelen. Een key aanmaken is stap 1 van de Aan de Slag-gids.